
- Java EE Tutorials
- JSP Tutorials
- Recommended Books for Java Server Pages (JSP)
Simple JSP Example using Eclipse
Let us write a simple JSP code using Eclipse IDE and execute it using a web application server (Tomcat).
Tools Used
We are using the following tools to write and execute our JSP code:
- Java 7
- Eclipse IDE
- Tomcat 7
Here we are assuming that the reader is well aware of the above mentioned tools and has knowledge of installation of these tools.
Once all the above mentioned tools are installed and configured, open the Eclipse IDE. Follow the below steps to create a simple JSP file using Eclipse.
Step 1: Create a Dynamic project as shown in the image below:

Figure 1: Dynamic Project Creation
Step 2: Type the project name as “HelloWorldJSP” and click Next.
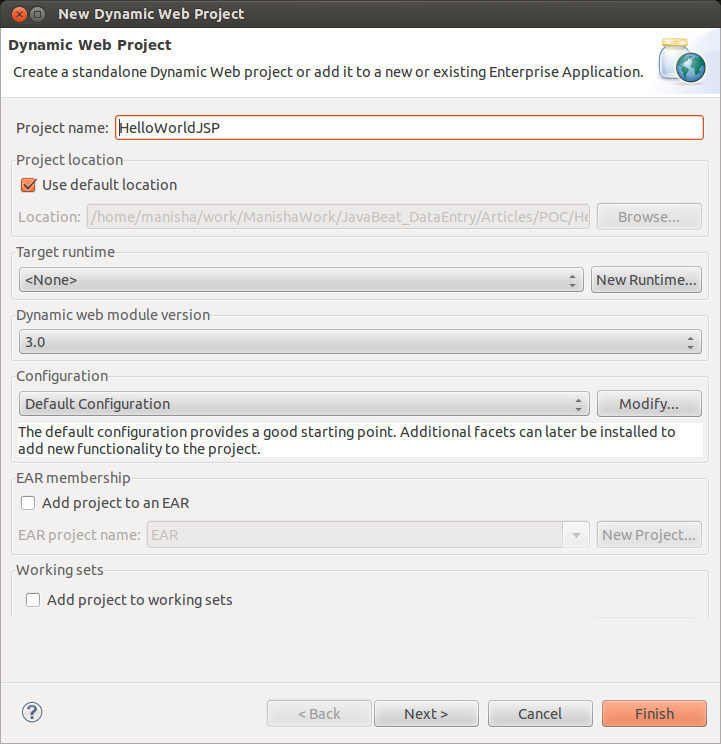 Figure 2: Name the project
Step 3: Now select the checkbox “Generate web.xml deployment descriptor” and click on Finish button.
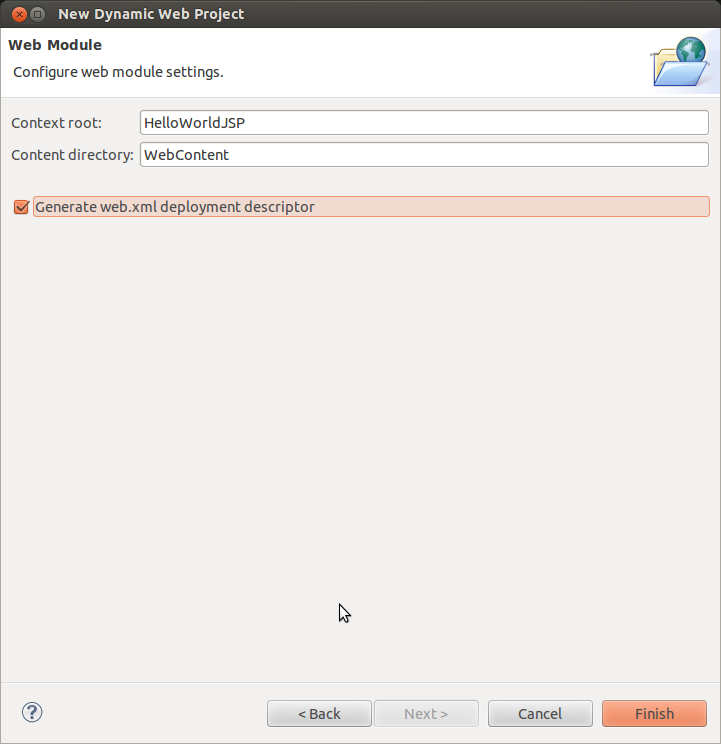 Figure 3:Finish
Step 4: Once the project is created, you can see the project structure as in the screen below:
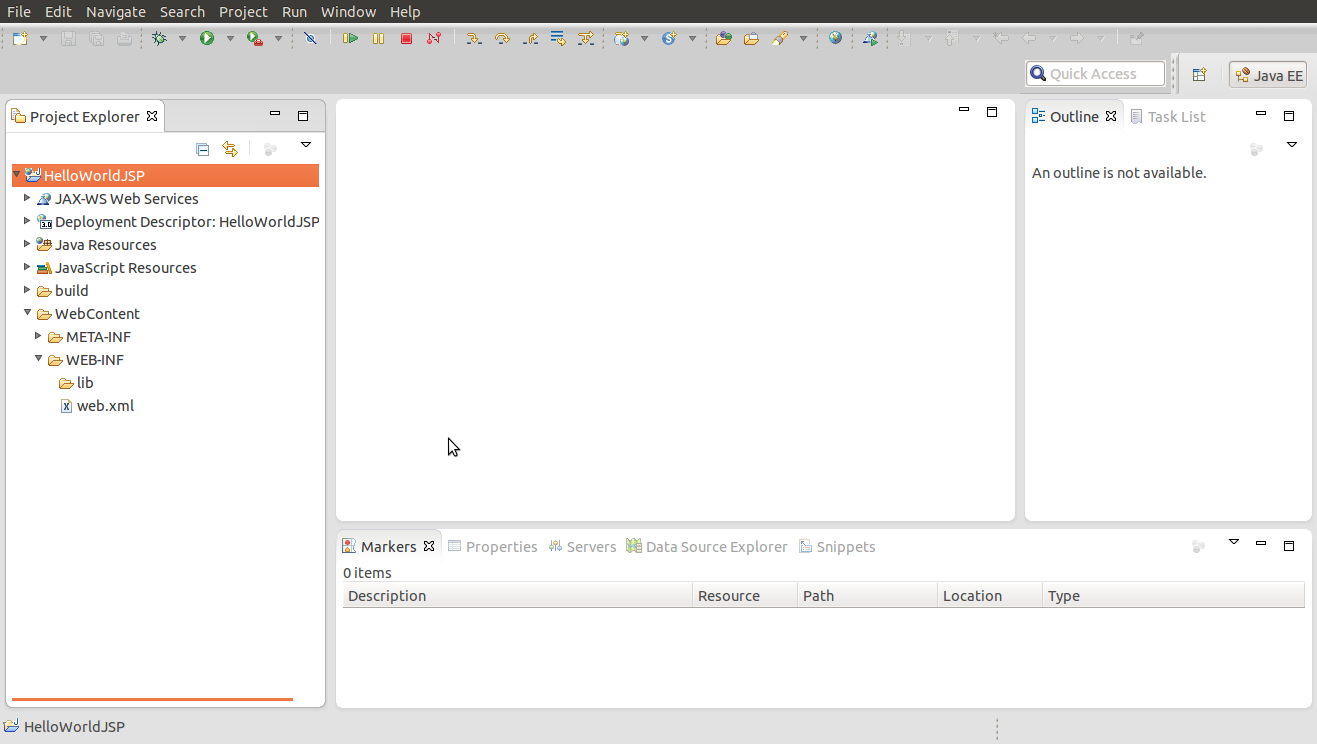 Figure 4:Project Structure
Step 5: Now create a JSP file under the WebContent folder as shown below:
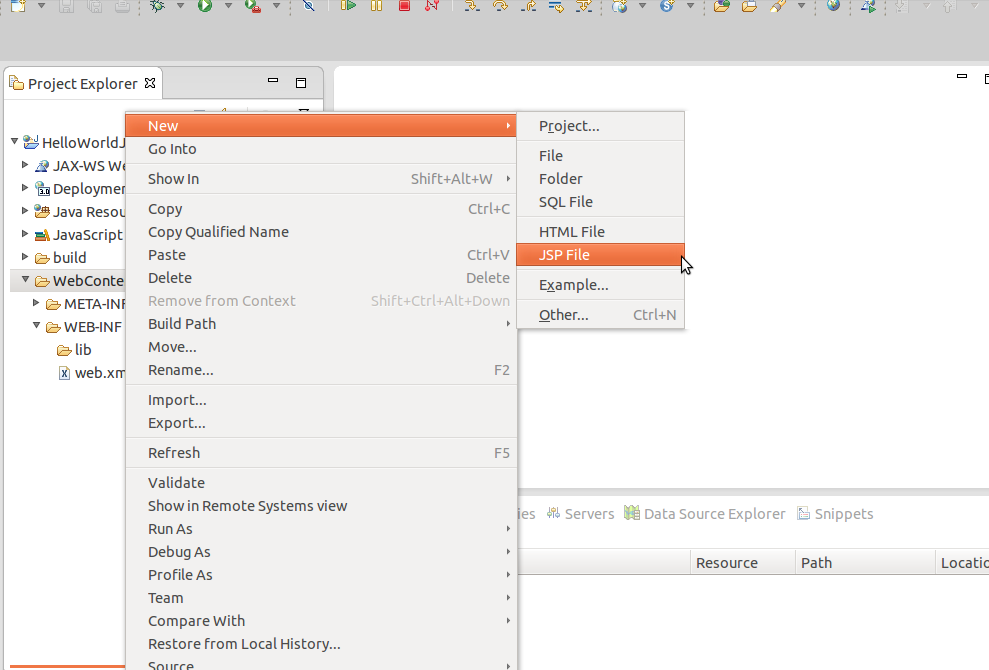 Figure 5:Create JSP file
Step 6: Name the file as hellojavabeat.jsp and click on Finish button.
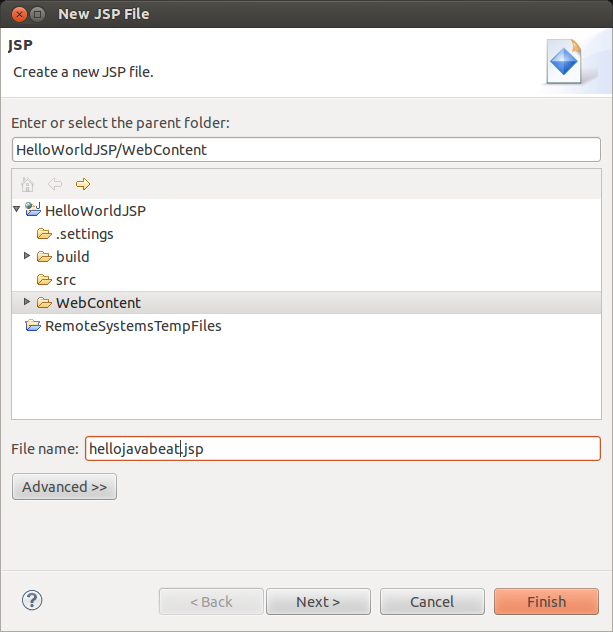 Figure 6:Give JSP file name
Step 7: Now open the file hellojavabeat.jsp and paste the below contents in it:
<%@ page language="java" contentType="text/html; charset=UTF-8"
    pageEncoding="UTF-8"%>
<!DOCTYPE html PUBLIC "-//W3C//DTD HTML 4.01 Transitional//EN" "http://www.w3.org/TR/html4/loose.dtd">
<html>
<head>
<meta http-equiv="Content-Type" content="text/html; charset=UTF-8">
<title>Insert title here</title>
</head>
<body>
<body>
    <% out.print("hello to Javabeat");%>
     <p>Today's date: <%= (new java.util.Date())%></p>

</body>
</html>
Here we are printing a message “hello to Javabeat” and current time using the tags which are called scriptlets. More about scriptlet will be discussed in next chapter.
Step 8: Now to execute this JSP, we need to configure a web server (in our case it is Tomcat 7). Now select the file hellojavabeat.jsp and select Run As > Run on Server as shown below:
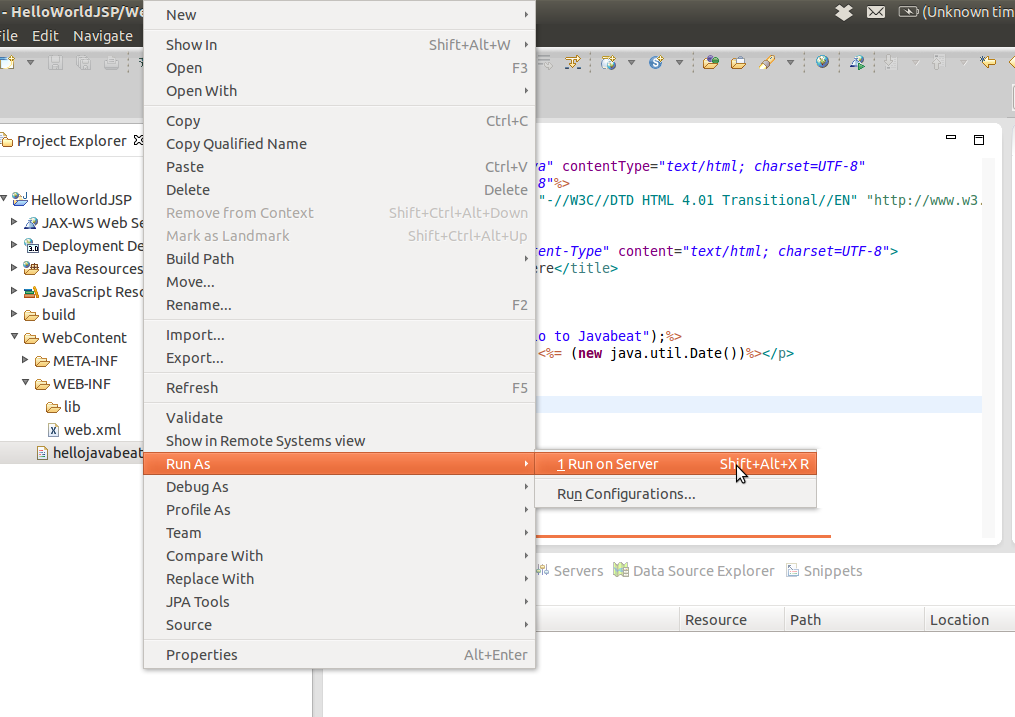 Figure 7:Execute JSP file
Step 9: Choose the Tomcat version on your system. In our case it is “Tomcat v7.0 Server” and click Next.
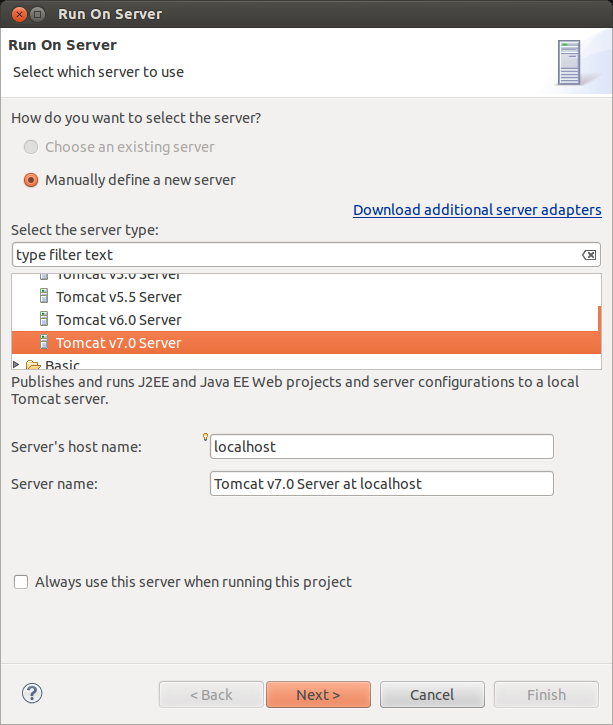 Figure 8:Configure Tomcat
Step 10:Set the Tomcat path (installed path) and click Next.
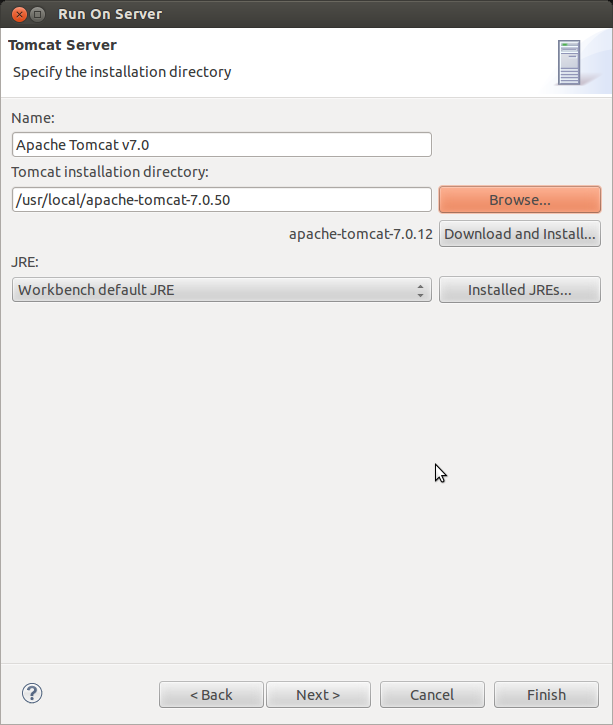 Figure 9: Set Tomcat Path
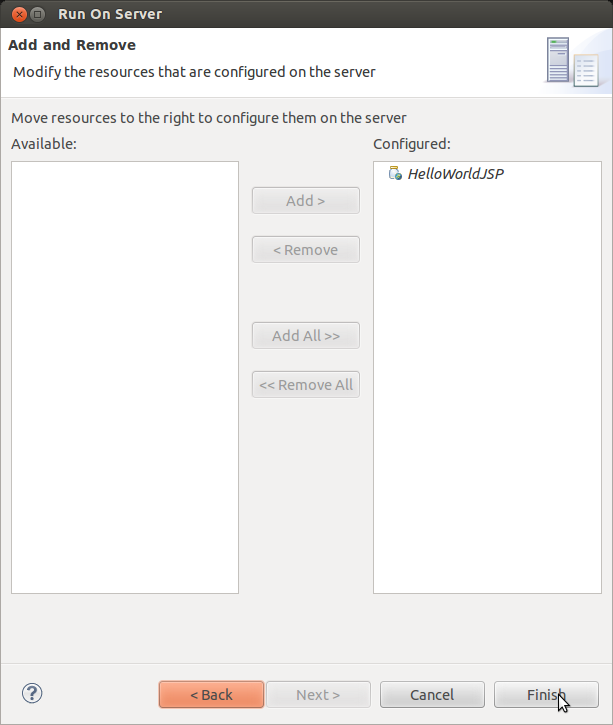
Step 11: Click Finish
Step 12: Now that you have configured web server with Eclipse, now run the JSP file by selecting Run As > Run on Server. The server will be started and output as shown in the screen below opens up:

Figure 10: Output
Previous Tutorial : JSP Architecture and Lifecycle || Next Tutorial : JSP Syntax
 What is Bootstrap?