
Spring Roo is a rapid application development tool for Java developers. With Roo, you can easily build full Java applications in minutes. This tutorial isn’t intended for providing full coverage for Spring Roo, rather it should spot the focus to provide a good introduction for using Spring Data inside those applications that built with Spring Roo.
You knew that Spring Data provides a Repository concept for providing the full-fledged CRUD (Create, Read, Update & Delete) operations against whatever persistent stores you are use.
At this tutorial, you will be able to use the Spring Roo for creating a Web Application that uses the latest concept that you’ve learned about the Spring Data. Inside this tour, you just want to create your database models and Spring Roo will achieve everything you want inside your application, ranging from Web Layer into Persistence Layer.
1. Database Model
For simplifying the concept we introduced you the simple database model that you could have ever been applied; so it’s just an Employee & Address Tables, in that an Employee have a foreign key that used for referring the Address id. The below snapshots will clarify you the database models that we’re going to use inside this tutorial.

Address Table

Employee Table

Employee Foreign Key
2. Spring Roo Library And Installation
To getting started using Spring Roo via command line or by integrating the Roo into your Eclipse IDE, you should install the Spring Roo into your machine and configure it. The installation and configuration process aren’t too complex. Follow the below steps for complete this installation.
- Download the Spring Roo Zip file.
- Unzip the downloaded file int your space. The supposed location that to be used at this tutorial is D:\SpringRoo\spring-roo-1.2.5.RELEASE.
- Add the D:\SpringRoo\spring-roo-1.2.5.RELEASE\bin path into your path system properties. Such that addition should make the Spring Roo executable from your command line. For executing the Spring Roo from the Eclipse still an additional steps required.

3. Spring Roo Eclipse Plugin Installation
By default, if you’ve not installed the Spring Source Tool (SST), you shouldn’t be able to use the Spring Roo from the Eclipse IDE unless you install the Spring Roo plugin. This section will guide you step by step for install that plugin into your Eclipse IDE. The Eclipse IDE suggested here is Eclipse 4.3 Kepler.
By following the steps you will be ready for using the Spring Roo from you Eclipse IDE:
- Determine the proper plugin version for your Eclipse IDE. Supposed Eclipse here is Eclipse Kepler 4.3 and for that we’ve been going to use SpringSource Update Site for Eclipse 4.3 link.
- By copying the above link and paste it inside the install new software that you’ve got when you pressed on the Install New Software that located under help menu.

- Select Core / Spring IDE, Extensions / Spring IDE, Resources / Eclipse Integration Commons & Resources / Spring IDE and click next and install it after that.
- Wait a while for the new plugins being installed and restart the Eclipse when the eclipse itself asked you to restart it.
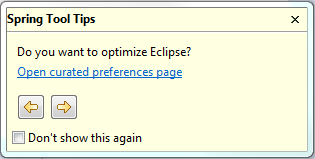
- After restarting the Eclipse IDE, you should notice a new Tool Tip Window that shown and titled with Spring Too Tip.
- Now, you are ready for getting started using the Spring Roo to develop a Web Application inside Eclipse IDE.
4. Create Spring Roo Project in Eclipse
For getting started using the Spring Roo, you have to create a Spring Roo project using the Eclipse IDE. Follow the below steps:
- Open your Eclipse IDE.
- Right-click on the Right Pane (Project Explorer) and select New -> Other.
- From the Spring category, select Spring Roo Project & click next.
- Name the project SpringData-Roo.
- Type net.javabeat inside the Top Level package name.
- Configure the Roo Installation by clicking on Configure Roo Installation.

- Select Roo Support and click Add.
- From the opened dialog click browse and navigate into the Spring Roo parent directory. For this tutorial the parent directory is D:\SpringRoo\spring-roo-1.2.5.RELEASE and click Okay.
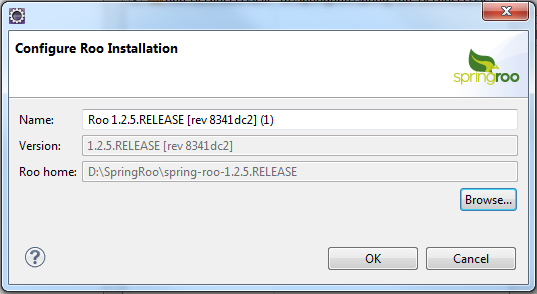
- Click Okay until you returned back into Create Project Dialog.
- From the Packaging Provider select the option Select a built-in provider.
- From the packaging select WAR.
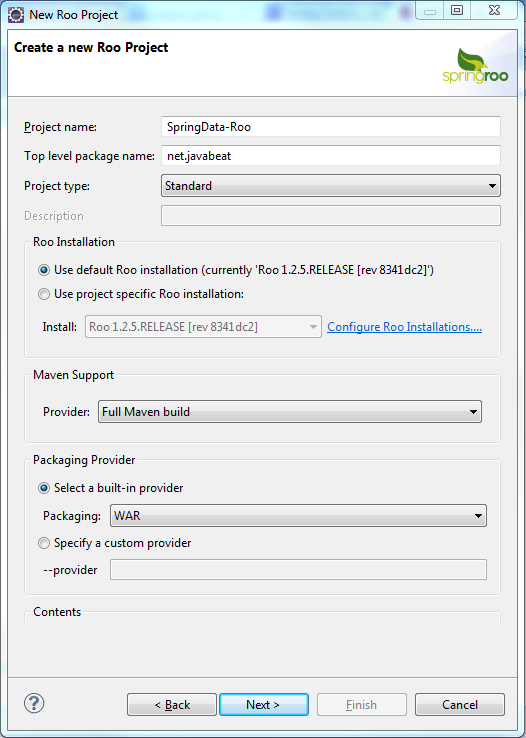
- Click next and finish.
- Wait a while for being Spring Roo initialized and the integrated Roo command line be available and ready for use.
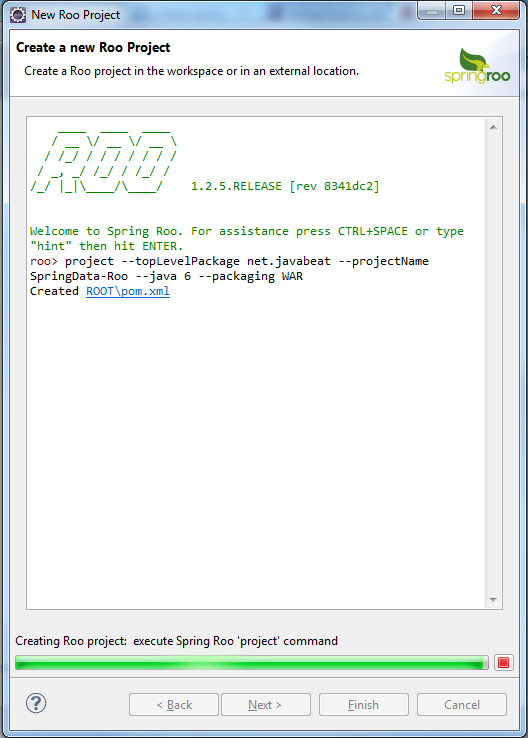
- After you’ve seen the above screen, wait a while for being Roo Shell opened.

- Spring Roo is installed and ready for use from your Eclipse IDE.
5. Setup Persistence Layer
For setting up the persistence layer you have to type the following command persistence setup –provider ECLIPSELINK –database MYSQL –databaseName javabeat –hostName 10.10.90.3 –userName root –password root.
By providing that instruction, Spring Roo will create the all persistence artifacts and include them inside your project.
6. Create Entities – Reverse Engineering
For creating the JPA entities, you’ve provided different ways for doing that. The simplest way is by Reversing the current tables that located inside your database by typing database reverse engineer –schema javabeat –package ~roo.domain –activeRecord false –disableVersionFields –disableGeneratedIdentifiers.
By executing that command inside your Eclipse IDE Roo Shell, you are about getting the entities from your Database by reversing the tables inside of it.
- Be sure that you’ve provided the option –activeRecord false which means that we will have to provide the CRUD functionality using a Spring Data Repository.
- In case you’ve faced any problem like missing of MySQL driver, you can add the MySQL driver library by typing osgi start –url file:///C:\mysql-connector-java-5.1.24-bin.jar into Roo Shell.
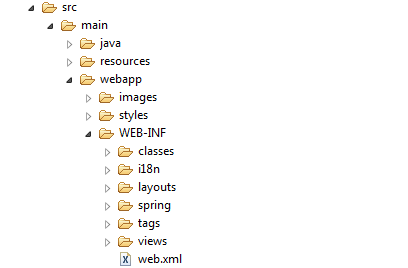
By finishing the above two steps, your project should look like the below snapshot.

- All of those files related to the Persistence Configuration are added by executing the setup persistence layer Roo command.
- Employee and Address entities are created by executing the reverse engineering Roo command.
7. Create Spring Data Repository
For creating Spring Data Repository, you have to execute the following commands.
- For creating Employee Repository execute repository jpa –interface ~.roo.repository.EmployeeRepository –entity ~.roo.domain.Employee.
- The string token ~ refers to initial package that you’ve provided at the first step, when you create the project as Roo Project.
- For creating Address Repository execute repository jpa –interface ~.roo.repository.AddressRepository –entity ~.roo.domain.Address.

8. Create Web Layer using Spring Roo
For creating a web layer for for this application with Spring Roo, you don’t need more than three additional commands. Those additional commands should be executed as their order shown below.
- Executing of web mvc setup should setup the basic project structure for a Spring MVC/JSP application.
- Executing of web mvc scaffold –class ~.roo.web.EmployeeController –backingType ~.roo.domain.Employee & web mvc scaffold –class ~.roo.web.AddressController –backingType ~.roo.domain.Address should create the controllers that used by Spring Roo for maintaining the CRUD functionality automatically.
9. Spring Roo Example Application Demo
For executing the application as a whole, you have to put the build your application by navigating into Project menu and use click menu item. After your application is ready for use; just set the cursor into your project SpringData-Roo and select the Run As and select any Apache Tomcat Server installed.
The Apache Server that installed for this tutorial is v 7, and wait a while for being the Apache server run. Once the running phase has been done, the home page of your application should be displayed into your browser.

By navigating into Create New Address you are able to create an address for being used later on.

And by navigating into Create New Employee you have the chance to create a new Employee and associate it with already created Address.

Also, you have the ability to list all the employees and addresses that you have.


10. Records Saved
The below snapshot shows you the records that persisted into database using the Spring Data Roo integration.

11. Summary
Spring Data has transferred the development tasks into be much easier by integrating the latest newly development tool such as Spring Roo. Today, you can easily create your own Spring Data – JPA repository through one command, so no need to implement any interface or adding additional lines of codes for achieving what Spring Data had promised. If you have any questions, please write it in the comments section.