
In my previous posts Spring bean scopes (Singleton and Prototype) with example and Spring bean scopes (Request, Session, Global Session) with example I discussed about the bean scopes in spring. There’s one more scope which I forgot to mention, its the Thread scope. The spring documentation states that As of Spring 3.0, a thread scope is available, but is not registered by default. I shall not cover this aspect as its already explained in detail in the spring documentation. In this post I shall cover one more aspect of spring bean scope i.e Custom Scopes.
1. Custom Scope in Spring
As per the Spring doc As of Spring 2.0, the bean scoping mechanism is extensible. You can define your own scopes, or even redefine existing scopes, although the latter is considered bad practice and you cannot override the built-in singleton and prototype scopes.
- [download id=”16″]
A custom scope typically corresponds to a backing store that can manage object instances. In this case, Spring provides its familiar programming model, enabling injection and look-up, and the backing store provides instance management of the scoped objects. Typical backing stores are:HTTP session, Clustered cache, Other persistent store
The need to create a Custom Scope actually depends on the problem at hand. For instance, you might want to create a pre-defined number of instances of a particular bean, but not more than that. So until this number is met, you keep creating new instances, but once the number is met, you return existing instances in a balanced manner. This is just one context or instance when we can use Custom Scopes. As said, the usage depends on the problem at hand.
Now let’s see how to integrate the custom scopes in spring framework with an example. In the following example I’ve created a MyScope as Custom Scope. The idea behind the Scope MyScope is to keep the short lived objects. Here, the beans will be alive until an explicit call is made to clear of all the bean instances. Follow the steps below:
2. Create Project in Eclipse
Let us have working Eclipse IDE in place.Create a simple Java Project using Eclipse IDE. Follow the option File -> New -> Project and finally select Java Project wizard from the wizard list. Now name your project as SpringCustomBeanScope using the wizard window.
3. Add external libraries and dependencies
Next let’s add the Spring Framework and common logging API libraries in our project. Right click on your project name SpringCustomBeanScope and then follow the following option available in context menu: Build Path -> Configure Build Path to display the Java Build Path window. Now use Add External JARs button available under Libraries tab to add the following core JARs from Spring Framework and Common Logging installation directories:
- antlr-2.7.2.jar
- spring-aop-3.2.2.RELEASE.jar
- spring-aspects-3.2.2.RELEASE.jar
- spring-beans-3.2.2.RELEASE.jar
- spring-context-support-3.2.2.RELEASE.jar
- spring-context-3.2.2.RELEASE.jar
- spring-core-3.2.2.RELEASE.jar
- spring-expression-3.2.2.RELEASE.jar
- commons-logging-1.1.1.jar
4. Implement Custom Scope bean
To integrate your custom scope(s) into the Spring container, you need to implement the org.springframework.beans.factory.config.Scope interface. Create the custom scope com.javabeat.MyScope under directory src/com/javabeat which implements Scope interface. The contents of the file are as below:
package com.javabeat;

import java.util.Collections;
import java.util.HashMap;
import java.util.Map;

import org.springframework.beans.factory.ObjectFactory;
import org.springframework.beans.factory.config.Scope;

public class MyScope implements Scope {
	private Map<String, Object> objectMap = Collections
			.synchronizedMap(new HashMap<String, Object>());

	/**
	 * (non-Javadoc)
	 *
	 * @see org.springframework.beans.factory.config.Scope#get(java.lang.String,
	 *      org.springframework.beans.factory.ObjectFactory)
	 */
	public Object get(String name, ObjectFactory<?> objectFactory) {
		if (!objectMap.containsKey(name)) {
			objectMap.put(name, objectFactory.getObject());
		}
		return objectMap.get(name);

	}

	/**
	 * (non-Javadoc)
	 *
	 * @see org.springframework.beans.factory.config.Scope#remove(java.lang.String)
	 */
	public Object remove(String name) {
		return objectMap.remove(name);
	}

	/**
	 * (non-Javadoc)
	 *
	 * @see org.springframework.beans.factory.config.Scope#registerDestructionCallback
         *  (java.lang.String, java.lang.Runnable)
	 */
	public void registerDestructionCallback(String name, Runnable callback) {
		// do nothing
	}

	/**
	 * (non-Javadoc)
	 *
	 * @see org.springframework.beans.factory.config.Scope#resolveContextualObject(java.lang.String)
	 */
	public Object resolveContextualObject(String key) {
		return null;
	}

	/**
	 * (non-Javadoc)
	 *
	 * @see org.springframework.beans.factory.config.Scope#getConversationId()
	 */
	public String getConversationId() {
		return "MyScope";
	}

	/**
	 * clear the beans
	 */
	public void clearBean() {
		objectMap.clear();
	}
}
Details of the above file:
The methods defined in Scope interface which needs to be implemented by the custom scope are as follows:
- Object get(String name, ObjectFactory objectFactory)
- Return the bean instance from underlying scope if the bean exists, otherwise return a new bean instance and bind the instance to the underlying scope for future references.
- String getConversationId()
- Return the Conversation id (if any) for the underlying scope.This identifier is different for each scope. For a session scoped implementation, this identifier can be the session identifier. Note: This method is optional.
- void registerDestructionCallback(String name, Runnable callback)
- Register a callback to be executed on destruction of the specified object in the scope (or at destruction of the entire scope, if the scope does not destroy individual objects but rather only terminates in its entirety).Note: This method is optional.
- Object remove(String name)
- Removes the bean instance from the underlying scope. Note: This method is optional.
- Object resolveContextualObject(String key)
- Resolves the contextual object (if any) for the given key. E.g. the HttpServletRequest object for key “request”.
There’s also another method called clearBean. This method should be invoked by the application (may be at regular intervals) to remove the short lived objects.
5. Create a example bean
Add com.javabeat.Person bean under directory src/com/javabeat. The contents of the file are as below:
package com.javabeat;

public class Person {
	/**
     * Default Constructor
     */
    public Person() {
        System.out.println("*** Person() constructor ***");
    }
}
6. Create spring configuration file and register the Custom scope bean
Create bean’s configuration file Custombean.xml under the src folder.
<?xml version="1.0" encoding="UTF-8"?>
<beans xmlns="http://www.springframework.org/schema/beans"
    xmlns:xsi="http://www.w3.org/2001/XMLSchema-instance"
    xmlns:aop="http://www.springframework.org/schema/aop"
    xsi:schemaLocation="http://www.springframework.org/schema/beans
    http://www.springframework.org/schema/beans/spring-beans.xsd
    http://www.springframework.org/schema/aop
    http://www.springframework.org/schema/aop/spring-aop.xsd">

   <bean id="myScope" class="com.javabeat.MyScope"/>

    <bean class="org.springframework.beans.factory.config.CustomScopeConfigurer">
        <property name="scopes">
            <map>
                <entry key="customscope">
                    <ref bean="myScope" />
                </entry>
            </map>
        </property>
    </bean>

    <bean name="p1" class="com.javabeat.Person" scope="customscope" />

</beans>
Few things to notice here:
MyScope is defined as a bean here with name customscope. Application can lookup this bean to remove the short lived beans.
MyScope is registered with the Spring IoC container using CustomScopeConfigurer with scope name myScope. The key will be the name of the Custom Scope to be used in the bean definition and the value will be bean which implement the scope.
Finally, the Person bean is defined with scope customscope.
7. Sample application for spring custom scope and testing
Create MainApp.java
Write a MainApp class under the directory src/com/javabeat. The contents of the file are as below:
package com.javabeat;

import org.springframework.context.ApplicationContext;
import org.springframework.context.support.ClassPathXmlApplicationContext;

public class MainApp {

	public static void main(String args[]) {
		ApplicationContext ctx = new ClassPathXmlApplicationContext(
				"Custombean.xml");

		// 1. Retrieve the bean 'p1' from Context
		System.out.println("Looking up 'p1'");
		Person p1 = ctx.getBean("p1", Person.class);

		// 2. Retrieve the bean 'p1' from Context again
		System.out.println("Looking up 'p1' again");
		Person p2 = ctx.getBean("p1", Person.class);
		// 3. The beans retrieved in step 1 and 2 should be same.
		System.out.println("p1 = " + p1.toString());
		System.out.println("p2 = " + p2.toString());

		// 4. Trigger the Clearing of bean.
		System.out.println("======================================================");
		System.out.println("Clearing the beans...");
		MyScope myScope = ctx.getBean("myScope", MyScope.class);
		myScope.clearBean();
		System.out.println("Clear Bean Completed.");
		System.out.println("======================================================");

		// 4. Retrieve the bean 'p1' from Context after clearing
		System.out.println("Looking up 'p1'");
		Person p3 = ctx.getBean("p1", Person.class);

		// 5. Retrieve the bean 'p1' from Context again after clearing
		System.out.println("Looking up 'p1' again");
		Person p4 = ctx.getBean("p1", Person.class);

		// 6. The beans retrieved in step 4 and 5 should be same.
		System.out.println("p3 = " + p3.toString());
		System.out.println("p4 = " + p4.toString());

	}
}
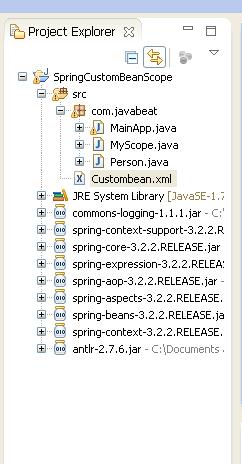
Final directory structure is as shown in the image below:
Run the sample application:
As a final step, let us run the application. If everything is fine with your application, the following output is printed:
Looking up 'p1'
*** Person() constructor ***
Looking up 'p1' again
p1 = com.javabeat.Person@7c7410
p2 = com.javabeat.Person@7c7410
======================================================
Clearing the beans...
Clear Bean Completed.
======================================================
Looking up 'p1'
*** Person() constructor ***
Looking up 'p1' again
p3 = com.javabeat.Person@a7c8bd
p4 = com.javabeat.Person@a7c8bd
We can see in the output that Person constructor is called first time when we requested the bean from the context, for the next request (at step 2), the Person constructor is not invoked, instead, Spring has returned the same instance which is created earlier (at step 1).
After removing/clearing bean, when we requested the bean p1 (at step 4), the Person constructor is invoked, and for the next request (at step 5), the instance which is created earlier (at step 4) is returned.
- [download id=”16″]
8. Summary
In this post we saw how to custom create a bean scope in Spring with an example. On similar lines custom scopes can be create for beans which can be shared between servlet contexts or for beans which can be shared within a same thread and many more examples. In the next post I shall cover “customizing Spring beans callback methods”. If you are interested in receiving the future articles, please subscribe here.
