Introduction
This article will provide an introduction to the Facelets framework with the assumption that the readers have a basic understanding on Java Server Pages. With the Introduction of JSF, the idea is to make JSP as the view technology for JSF. However the architecture of JSF and JSP are completely different and there were integration issues with the combination of JSF and JSP. With this in mind, Facelets was introduced which is another view definition framework similar to JSP. However, the architecture of the Facelets was designed with the complex JSF architecture and life-cycle in mind so that the component trees construction of Facelets can nicely mingle with JSF. Also in comparision with JSF, facelets can provide extending re-use of content code through templates.
also read:
Hello World Application
In this section, we will look into a starter application that will display the text Hello in the browser. The application will make the view as Facelets instead. We will provide explanation with the various aspects while going through the snippet code in the relevant section.
JSP Page
In the example application, the web application deployment descriptor is configured to look up for the file hello.jsp. The following is the code listing for the file hello.jsp. The page does a forward to the file hello.jsf. The extension of the forward file is ‘.jsf’ and in the application’s deployment descriptor (which we will be seeing in the next section), we will see such requests forwarded to the Faces Servlet.
hello.jsp
<%@page contentType="text/html" pageEncoding="UTF 8"%>
<jsp:forward page="hello.jsf"/>
Facelets Page
The code listing for the facelets page is given below. Once we can see that the following page has the extension .xhtml. Later on we will see how to map this extension to a Facelets page. Also within the page we have included the namespace uri ‘http://java.sun.com/jsf/facelets’ so that we can refer to Facelets related tags in the page.
Hello.xhtml
<?xml version='1.0' encoding='UTF-8' ?>
	<!DOCTYPE html PUBLIC "-//W3C//DTD XHTML 1.0 Transitional//EN" "http://www.w3.org/TR/xhtml1/DTD/xhtml1-transitional.dtd">
	<html xmlns="http://www.w3.org/1999/xhtml"
	xmlns:ui="http://java.sun.com/jsf/facelets"
	xmlns:h="http://java.sun.com/jsf/html">
	<body>

	<ui:composition template="/template.xhtml">

		<ui:define name="heading">
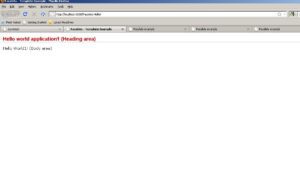
		Hello world application(Heading area)
		</ui:define>

		<ui:define name="body">
		Hello World1! (Body area)
		</ui:define>

	</ui:composition>

	</body>
</html>
In the above page, we have included the ui:composition and ui:define tags. The ui:composition along with the template attribute instructs that we want to use the page referenced in the attribute as the template page. The template page that we will look in the following section defines the section for the title content and the body content through ‘h1’ (heading) and ‘p’ (body) contents. The logical names given for the heading and the body content are ‘heading’ and ‘body’. Now back to the ‘hello.xhtml’, it is always possible to define or override the logical named sections in the template page. In our case, we have overridden the sections ‘heading’ and ‘body’ with some simple customized content through ui:define tags.
Template.xhtml
One could remember the usage of template.xhtml is the previous section, the content being giving in the following section. As discussed, this template page has provided named logical sections for the heading and the body area. It does this definition with the usage of ui:insert tags. Once this template page is defined, it is possible to override the named logical sections. For example, if the logical section ‘heading’ is not defined in the template-client page, i.e. the template page used by some client, in our case this file is hello.xhtml, then the content in the template.xhtml will be displayed.
template.xhtml
<?xml version='1.0' encoding='UTF-8' ?>
<!DOCTYPE html PUBLIC "-//W3C//DTD XHTML 1.0 Transitional//EN" "http://www.w3.org/TR/xhtml1/DTD/xhtml1-transitional.dtd">
<html xmlns="http://www.w3.org/1999/xhtml"
    xmlns:ui="http://java.sun.com/jsf/facelets">

	<head>
		<meta http-equiv="Content-Type" content="text/html; charset=UTF-8" />
		<title>Facelets - Template Example</title>
		<link href="./css/default.css" rel="stylesheet" type="text/css" />
	</head>

	<body>
		<h1>
			<ui:insert name="heading">Default Heading area to be overriden</ui:insert>
		</h1>
		<p>
			<ui:insert name="body">Default body area to be overriden</ui:insert>

	</body>

</html>
Web Application deployment Descriptor
The web application’s deployment descriptor file is given below. As you can see in the snippet code, the requests ending with ‘*.jsf’ are mapped to Faces Servlet. But till now we haven’t specified how Facelets is coming into the picture. We will see it shortly.
web.xml
<?xml version="1.0" encoding="UTF-8"?>
<web-app version="2.5" xmlns="http://java.sun.com/xml/ns/javaee" xmlns:xsi="http://www.w3.org/2001/XMLSchema-instance" xsi:schemaLocation="http://java.sun.com/xml/ns/javaee http://java.sun.com/xml/ns/javaee/web-app_2_5.xsd">
	<context-param>
		<param-name>com.sun.faces.verifyObjects</param-name>
		<param-value>true</param-value>
	</context-param>
	<context-param>
		<param-name>com.sun.faces.validateXml</param-name>
		<param-value>true</param-value>
	</context-param>
	<context-param>
		<param-name>javax.faces.DEFAULT_SUFFIX</param-name>
		<param-value>.xhtml</param-value>
	</context-param>
	<context-param>
		<param-name>facelets.DEVELOPMENT</param-name>
		<param-value>true</param-value>
	</context-param>
	<context-param>
		<param-name>facelets.SKIP_COMMENTS</param-name>
		<param-value>true</param-value>
	</context-param>

	<servlet>
		<servlet-name>Faces Servlet</servlet-name>
		<servlet-class>javax.faces.webapp.FacesServlet</servlet-class>
		<load-on-startup>1</load-on-startup>
	</servlet>
	<servlet-mapping>
		<servlet-name>Faces Servlet</servlet-name>
		<url-pattern>*.jsf</url-pattern>
	</servlet-mapping>

	<session-config>
		<session-timeout>
		30
		</session-timeout>
	</session-config>

	<welcome-file-list>
		<welcome-file>hello.jsp</welcome-file>
	</welcome-file-list>
</web-app>
Also, there are various parameters defined with respect to the Faces Servlet. Significant parameters being the development mode (represented through facelets.DEVELOPMENT) which when set to true instructs the framework that the application is still in development and any errors during page requests will be displayed in the browser.
Sun-web.xml
The vendor specific application’s deployment descriptor is given below. It defines the context name of the application set to Facelets-Helo
sub-web.xml
<?xml version="1.0" encoding="UTF-8"?>
<!DOCTYPE sun-web-app PUBLIC "-//Sun Microsystems, Inc.//DTD Application Server 9.0 Servlet 2.5//EN" "http://www.sun.com/software/appserver/dtds/sun-web-app_2_5-0.dtd">
<sun-web-app error-url="">
	<context-root>/Facelets-Hello</context-root>
</sun-web-app>
Faces Configuration file
The view handler for JSF is implemented through ViewHandler. To ensure that our application is using the View definition framework of Facelets, all we have to do is to replace the JSF version of View Handler with the Facelets view which happens to be ‘com.sun.facelets.FaceletViewHandler’ in the configuration file.
faces-config.xml
<?xml version='1.0' encoding='UTF-8'?>

<faces-config version="1.2"
	xmlns="http://java.sun.com/xml/ns/javaee"
	xmlns:xsi="http://www.w3.org/2001/XMLSchema-instance"
	xsi:schemaLocation="http://java.sun.com/xml/ns/javaee http://java.sun.com/xml/ns/javaee/web-facesconfig_1_2.xsd">

	<application>
		<view-handler>
			com.sun.facelets.FaceletViewHandler
		</view-handler>
	</application>

</faces-config>
Facelets – Hello Application.
Templates in Facelets
In this section, we will extend the hello application to develop a simple web-site’s home page that will display the header, footer and other areas. We will see the real power of Facelets template in this section.
Footer Page
First, we will define the footer for the web-page. Note that usually the footer area will be common across all the pages within the web-site. So it would be wise to define the contents of the footer in page and reuse it wherever necessary.
footer.xhtml
<?xml version="1.0" encoding="ISO-8859-1" ?>
<!DOCTYPE html PUBLIC "-//W3C//DTD XHTML 1.0 Transitional//EN"
"http://www.w3.org/TR/xhtml1/DTD/xhtml1-transitional.dtd">
<html xmlns="http://www.w3.org/1999/xhtml">
	<head>
		<meta http-equiv="Content-Type" content="text/html; charset=ISO-8859-1" />
	</head>
	<body>
		<div style="background-color: #82CAFA; color: #FFFFFF; width: 100%;">@<pre lang="LANGUAGE" line="1" lang="LANGUAGE" line="1" (2004-2010),India</div>
	</body>
</html>
Header Page
The code listing for the header page is given below in the file header.xhtml. The header page provides welcome information to the users and it is expected that this page will be getting referenced in multiple pages.
header.xhtml
<?xml version="1.0" encoding="ISO-8859-1" ?>
<!DOCTYPE html PUBLIC "-//W3C//DTD XHTML 1.0 Transitional//EN"
"http://www.w3.org/TR/xhtml1/DTD/xhtml1-transitional.dtd">

<html xmlns="http://www.w3.org/1999/xhtml">
	<body>
		<div style="background-color: #82CAFA; color: #FFFFFF; width: 100%;">
		Welcome to <pre lang="LANGUAGE" line="1" lang="LANGUAGE" line="1"
		</div>
	</body>
</html>
Template Page
In this section, we will see the template page definition for a page. This template will provide the logical view definitions for header, footer, left side navigation menu, right side navigation menu and the contents. Note that it is usually the content area which used to be different across pages.
template.xhtml
<!DOCTYPE html PUBLIC "-//W3C//DTD XHTML 1.0 Transitional//EN" "http://www.w3.org/TR/xhtml1/DTD/xhtml1-transitional.dtd">
<html xmlns="http://www.w3.org/1999/xhtml"
xmlns:ui="http://java.sun.com/jsf/facelets"
xmlns:h="http://java.sun.com/jsf/html">

	<head>
		<title>Facelets example</title>
	</head>

	<body >
		<div style="border-bottom: grey; border-left: grey; border-right: grey; border-top: grey; height: 100%;text-align: center; width: 100%;">
			<ui:insert name="header">
				<ui:include src="header.xhtml" />
			</ui:insert>
		</div>

		<table width="100%" >
			<tr>
				<td width="20%">

					<div style="background-color: #82CAFA; color: #FFFFFF;height: 250px; width: 100%;text-align: center;">
					<br/>
					<ui:insert name="leftSideMenu">
					<h:form>
					<h:commandLink value="Home"></h:commandLink>
					<br/><br/>
					<h:commandLink value="News"></h:commandLink>
					<br/><br/>
					<h:commandLink value="Articles"></h:commandLink>
					<br/><br/>
					<h:commandLink value="About Us"></h:commandLink>
					<br/><br/>
					</h:form>
					</ui:insert>
					</div>
				</td>

				<td width="60%">
					<div style="background-color: #82CAFA;text-align: center;">
					<ui:insert name="content">Content displayed from Template </ui:insert>
					</div>
					</td>
					<td width="20%">
					<div style="background-color: #82CAFA; color: #FFFFFF;height: 250px; width: 100%;text-align: center;">
					<br/>
					<ui:insert name="righSideMenu">
					<h:form>
					<h:commandLink value="Java"></h:commandLink>
					<br/><br/>
					<h:commandLink value="J2EE"></h:commandLink>
					<br/><br/>
					<h:commandLink value="Spring"></h:commandLink>
					<br/><br/>
					<h:commandLink value="Hibernate"></h:commandLink>
					<br/><br/>
					</h:form>
					</ui:insert>
					</div>
				</td>
			</tr>
		</table>

		<div style="border-bottom: grey; border-left: grey; border-right: grey; border-top: grey; height: 100%;text-align: center; width: 100%;">
			<ui:insert name="footer">
			<ui:include src="footer.xhtml" />
			</ui:insert>
		</div>
	</body>

</html>
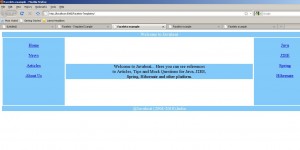
In the above template page, we have defined logical sections through the ‘ui:insert’ tags. The named logical areas that we have defined for the header, footer, left side navigation menu, right side navigation menu, content are ‘header’, ‘footer’, ‘leftSideMenu’, ‘rightSideMenu’, and ‘content’ respectively. Note that we have made use of the ‘ui:insert’ tag for the header and the footer tags which is used a resource. The resources happen to the header.xhtml and footer.xhtml that we had discussed previously.
Home Page
Now that we have looked into the template page that defines the header, footer and others, we will look into the definition of a template-client page. One such page that uses the template page is the homepage.xhtml, the code listing for which is given below.
homepage.xhtml
<!DOCTYPE html PUBLIC "-//W3C//DTD XHTML 1.0 Transitional//EN"
        "http://www.w3.org/TR/xhtml1/DTD/xhtml1-transitional.dtd">
	<html xmlns="http://www.w3.org/1999/xhtml"
	xmlns:ui="http://java.sun.com/jsf/facelets"
	xmlns:h="http://java.sun.com/jsf/html"
	xmlns:f="http://java.sun.com/jsf/core">

	<ui:composition template="templates/template.xhtml">

		<ui:define name="content">
			Welcome to <pre lang="LANGUAGE" line="1" lang="LANGUAGE" line="1"... Here you can see references <br/> to Articles, Tips and Mock Questions for Java, J2EE,<br/> Spring, Hibernate and other platform.<br/>
		</ui:define>

	</ui:composition>

</html>
In the above page, we have defined the ui:composition tag whose template attribute points to the template.xhtml page that we created just before. Note that we want to keep the original definition of the header, footer, left navigation menu and the right navigation menu. However, we want to override the definition of the content area. To achieve that, we have used the ui:define tag which overrides the default content with the one relevant to the home page.
Facelets – Templates Demo Application.
UI Components and Backing Beans
In this section, we will introduce the new tag ‘ui:component’ which is used to introduce a new component in the component’s root hierarchy. Also we will introduce the usage of backing beans in facelets. In the last example that we introduced, if we recall, the template page defined the left side menu items and the right side menu items. The content of the menu items is hard-coded. Now in this section, we will see how to pass the list of items to be displayed in the template page for better reuse.
Menu Item
We will define the model object for the displayable menu item. The model object defines the name of the menu item as well as the url. For simplicity, we will ignore the value of the url propery. Here is the listing for the java model MenuItem.
MenuItem.java
package net.articles.facelets;

public class MenuItem {

	private String url;
	private String name;

	public MenuItem(String url, String label) {
		this.url = url;
		this.name = label;
	}

	public String getUrl() {
		return url;
	}

	public void setUrl(String url) {
		this.url = url;
	}

	public String getName() {
		return name;
	}

	public void setName(String name) {
		this.name = name;
	}
}
Backing Bean
We will look into the definition of the backing bean in the following section. In our application, backing bean is used to store the contents of the menu items to be displayed in the left side as well as in the right side.
MenuBackingBean.java
package net.articles.facelets;
import java.util.ArrayList;
import java.util.List;

public class MenuBackingBean {

	private List<MenuItem> leftSideMenuItems;
	private List<MenuItem> rightSideMenuItems;

	public List<MenuItem> getLeftSideMenuItems() {

		if (leftSideMenuItems == null || leftSideMenuItems.size() == 0){
			leftSideMenuItems = new ArrayList<MenuItem>();
			leftSideMenuItems.add(new MenuItem("home.xhtml", "Home"));
			leftSideMenuItems.add(new MenuItem("news.xhtml", "News"));
			leftSideMenuItems.add(new MenuItem("articles.xhtml", "Articles"));
			leftSideMenuItems.add(new MenuItem("certifications.xhtml", "Certifications"));
			leftSideMenuItems.add(new MenuItem("bookstore.xhtml", "Book Store"));
			leftSideMenuItems.add(new MenuItem("feeds.xhtml", "Feeds"));
			leftSideMenuItems.add(new MenuItem("about.xhtml", "About Us"));
		}
		return leftSideMenuItems;
	}

	public void setLeftSideMenuItems(List<MenuItem> leftSideMenuItems) {
		this.leftSideMenuItems = leftSideMenuItems;
	}

	public List<MenuItem> getRightSideMenuItems() {
		if (rightSideMenuItems == null || rightSideMenuItems.size() == 0){
			rightSideMenuItems = new ArrayList<MenuItem>();
			rightSideMenuItems.add(new MenuItem("java.xhtml", "Java"));
			rightSideMenuItems.add(new MenuItem("j2ee.xhtml", "J2EE"));
			rightSideMenuItems.add(new MenuItem("spring.xhtml", "Spring"));
			rightSideMenuItems.add(new MenuItem("hibernate.xhtml", "Hibernate"));
			rightSideMenuItems.add(new MenuItem("struts.xhtml", "Struts"));
			rightSideMenuItems.add(new MenuItem("jsf.xhtml", "JSF"));
			rightSideMenuItems.add(new MenuItem("ejb.xhtml", "EJB"));
		}
		return rightSideMenuItems;
	}

	public void setRightSideMenuItems(List<MenuItem> rightSideMenuItems) {
		this.rightSideMenuItems = rightSideMenuItems;
	}
}
Have a look at the definition of the methods getLeftSideMenuItems() and getRightSideMenuItems(). We have checked for the emptiness of the collection and if found to be empty, have initialized the collection with some values before returning it.
Template page
Have a look at the modified version of the template page. It no longer defines the content of the left side and the right side menu items. Instead it defines the logical area for the left side and the right side menu items and leaves it for the template client to be overridden.
template.xhtml
<!DOCTYPE html PUBLIC "-//W3C//DTD XHTML 1.0 Transitional//EN" "http://www.w3.org/TR/xhtml1/DTD/xhtml1-transitional.dtd">
<html xmlns="http://www.w3.org/1999/xhtml"
xmlns:ui="http://java.sun.com/jsf/facelets"
xmlns:h="http://java.sun.com/jsf/html">

	<head>
		<title>Facelets example</title>
	</head>

	<body >
		<div style="border-bottom: grey; border-left: grey; border-right: grey; border-top: grey; height: 100%;text-align: center; width: 100%;">
			<ui:insert name="header">
			<ui:include src="header.xhtml" />
			</ui:insert>
		</div>

		<table width="100%" >
			<tr>
			<td width="20%">

				<div style="background-color: #82CAFA; color: #FFFFFF;height: 250px; width: 100%;text-align: center;">
				<br/>
				<ui:insert name="leftSideMenu">
				</ui:insert>
				</div>
			</td>

			<td width="60%">
				<div style="background-color: #82CAFA;text-align: center;">
				<ui:insert name="content">Content displayed from Template </ui:insert>
				</div>
			</td>

			<td width="20%">
				<div style="background-color: #82CAFA; color: #FFFFFF;height: 250px; width: 100%;text-align: center;">
				<br/>
				<ui:insert name="rightSideMenu">
				</ui:insert>
				</div>
			</td>

			</tr>
		</table>

		<div style="border-bottom: grey; border-left: grey; border-right: grey; border-top: grey; height: 100%;text-align: center; width: 100%;">
			<ui:insert name="footer">
			<ui:include src="footer.xhtml" />
			</ui:insert></div>
	</body>

</html>
Note that the logical area defined for the left side and the right side menu are ‘leftSideMenu’ and ‘rightSideMenu’ respectively.
Home Page
Here is the revised version of the home page. Not that it is upto the home page now to give the definition for the left side and the right side menu items. It does so by overriding the logical named areas ‘leftSideMenu’ and ‘rightSideMenu’ through ui:define tags.
homePage.xhtml
<!DOCTYPE html PUBLIC "-//W3C//DTD XHTML 1.0 Transitional//EN"
"http://www.w3.org/TR/xhtml1/DTD/xhtml1-transitional.dtd">
<html xmlns="http://www.w3.org/1999/xhtml"
xmlns:ui="http://java.sun.com/jsf/facelets"
xmlns:h="http://java.sun.com/jsf/html"
xmlns:f="http://java.sun.com/jsf/core">

	<ui:composition template="templates/template.xhtml">

		<ui:define name="leftSideMenu">
			<ui:include src="menuItems.xhtml" >
			<ui:param name="menus" value="#{menuBackingBean.leftSideMenuItems}"/>
			</ui:include>
		</ui:define>

		<ui:define name="content">
			Welcome to <pre lang="LANGUAGE" line="1" lang="LANGUAGE" line="1"... Here you can see references <br/>
			to Articles, Tips and Mock Questions for Java, J2EE,<br/>
			Spring, Hibernate and other platform.<br/>
		</ui:define>

		<ui:define name="rightSideMenu">
			<ui:include src="menuItems.xhtml" >
				<ui:param name="menus" value="#{menuBackingBean.rightSideMenuItems}"/>
			</ui:include>
		</ui:define>

	</ui:composition>
</html>
Have a look at the implementation of the menu items. It makes an inclusion of the generic menuItems.xhtml page through the ui:include tag. Because the content of the left side and right side menu items is going to vary, the menuItems.xhml is passed with the parameter ‘menus’ through the tag ‘ui:param’. This means that the referencing page menuItems.xhtml can make use of the named parameter ‘menus’.
Menu Items
Here is the code snippet for the menuItems.xhtml. Note that this page defines a new component through ui:component tag. Note that the implementation iterates over the parameter passed, which is a collection, to get a reference to the MenuItem object. It then makes use of the properties name and url for getting displayed as a link.
MenuItem.xhtml
<!DOCTYPE html PUBLIC "-//W3C//DTD XHTML 1.0 Transitional//EN"
"http://www.w3.org/TR/xhtml1/DTD/xhtml1-transitional.dtd">
<html xmlns="http://www.w3.org/1999/xhtml"
xmlns:ui="http://java.sun.com/jsf/facelets"
xmlns:h="http://java.sun.com/jsf/html"
xmlns:f="http://java.sun.com/jsf/core"
xmlns:c="http://java.sun.com/jstl/core">

	<ui:component>
		<c:forEach var="menuItem" items="#{menus}">
			<a href="#{menuItem.url}">#{menuItem.name}</a><br/>
		</c:forEach>
	</ui:component>

</html>
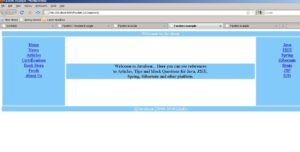
Facelets – Templates Demo Application.
Writing Custom Tags
In the final section of the article, we will see how to write custom tag definitions using Facelets. We will extend the display of the menu items as a custom tag. As with all tag definition frameworks, writing custom tag invokes the declaration of the tag in an xml file, providing the implementation of the tag and then finally using it in a client page.
Tag Definition
Here is the listing for the tag definition. It defines two tags ‘verticalMenu’ and ‘horizontalMenu’ in the namespace ‘http://<pre lang="LANGUAGE" line="1" lang="LANGUAGE" line="1".net/facelets'. The source for the two tags comes from 'verticalMenu.xhtml' and 'horizontalMenu.xhtml' file. These files contain the implementation of the two tags.
Tag Definition
<?xml version="1.0" encoding="UTF-8"?>
<!DOCTYPE facelet-taglib PUBLIC "-//Sun Microsystems,
Inc.//DTD Facelet Taglib 1.0//EN" "facelet-taglib_1_0.dtd" >
<facelet-taglib>

	<namespace>http://<pre lang="LANGUAGE" line="1" lang="LANGUAGE" line="1".net/facelets</namespace>

	<tag>
		<tag-name>verticalMenu</tag-name>
		<source>../tags/verticalMenu.xhtml</source>
	</tag>

	<tag>
		<tag-name>horizontalMenu</tag-name>
		<source>../tags/horizontalMenu.xhtml</source>
	</tag>

</facelet-taglib>
Vertical Menu
In the implementation of the tag ‘verticalMenu’, we have imitated that logic that we used in the last section which iterates over the collection for displaying the menu items horizontally.
verticalMenu.xhtml
<!DOCTYPE html PUBLIC "-//W3C//DTD XHTML 1.0 Transitional//EN"
"http://www.w3.org/TR/xhtml1/DTD/xhtml1-transitional.dtd">
<html xmlns="http://www.w3.org/1999/xhtml"
xmlns:ui="http://java.sun.com/jsf/facelets"
xmlns:h="http://java.sun.com/jsf/html"
xmlns:f="http://java.sun.com/jsf/core"
xmlns:c="http://java.sun.com/jstl/core">

	<ui:component>
		<c:forEach var="menuItem" items="#{menus}">
			<a href="#{menuItem.url}">#{menuItem.name}</a>
			<br/>
		</c:forEach>
	</ui:component>

</html>
Horizontal Menu
Similarly for the implementation of the tag ‘horizontalMenu’, we have ensured that the menu items are displayed horizontally leaving the line break tag.
horizontalMenu.java
<!DOCTYPE html PUBLIC "-//W3C//DTD XHTML 1.0 Transitional//EN"
"http://www.w3.org/TR/xhtml1/DTD/xhtml1-transitional.dtd">
<html xmlns="http://www.w3.org/1999/xhtml"
xmlns:ui="http://java.sun.com/jsf/facelets"
xmlns:h="http://java.sun.com/jsf/html"
xmlns:f="http://java.sun.com/jsf/core"
xmlns:c="http://java.sun.com/jstl/core">

	<ui:component>
		<c:forEach var="menuItem" items="#{menus}">
			<a href="#{menuItem.url}">#{menuItem.name}</a>
		</c:forEach>
	</ui:component>

</html>
Tag Inclusion
Once these tags are defined, the application’s deployment descriptor has to be updated with the tag definition file so that the application accessing the tag has the visibility. The code snippet for the inclusion of the tag definition file is given below.
<context-param>
	    ..
    <param-name>facelets.LIBRARIES</param-name>
    <param-value>/WEB-INF/facelets/custom.xml</param-value>
    ..
    </context-param>
Home Page
The final version of the home page making use of the custom tag is given below. The very first thing that it does is defining the prefix ‘jb’ pointing to the namespace ‘http://<pre lang="LANGUAGE" line="1" lang="LANGUAGE" line="1".net/facelets'.
homePage.xhtml
<!DOCTYPE html PUBLIC "-//W3C//DTD XHTML 1.0 Transitional//EN"
"http://www.w3.org/TR/xhtml1/DTD/xhtml1-transitional.dtd">
<html xmlns="http://www.w3.org/1999/xhtml"
xmlns:ui="http://java.sun.com/jsf/facelets"
xmlns:h="http://java.sun.com/jsf/html"
xmlns:f="http://java.sun.com/jsf/core"
xmlns:jb="http://<pre lang="LANGUAGE" line="1" lang="LANGUAGE" line="1".net/facelets" >

	<ui:composition template="templates/template.xhtml">

		<ui:define name="leftSideMenu">
			<jb:verticalMenu menus="#{menuBackingBean.leftSideMenuItems}"/>
		</ui:define>

		<ui:define name="content">
			Welcome to <pre lang="LANGUAGE" line="1" lang="LANGUAGE" line="1"... Here you can see references <br/>
			to Articles, Tips and Mock Questions for Java, J2EE,<br/>
			Spring, Hibernate and other platform.<br/>
		</ui:define>

		<ui:define name="rightSideMenu">
			<jb:horizontalMenu menus="#{menuBackingBean.rightSideMenuItems}"/>
		</ui:define>

	</ui:composition>
</html>
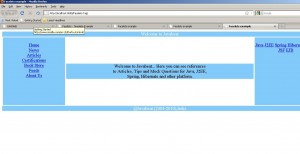
The definition of the logical areas ‘leftSideMenu’ and ‘rightSideMenu’ have been updated with the usage of the custom tag. Note the usage of the tags ‘jb:horizontalMenu’ and ‘jb:verticalMenu’ and the passing of the named parameter ‘menus’.
Facelets – Tag Demo Application.
Conclusion
This article attempted an introduction to the facelets Framework by providing a brief discussion of the various components. The article initially dealt with the starter application that discussed the various aspects suitable for the setup of a Facelets application. It then went on to details of the templating aspects of Facelets through the ui:composition, ui:define and ui:insert tags. Discussion on backing beans and passing parameters from one facelet page to another facelet page is also discussed along with ui:component tag. Finally the article concluded with writing custom tag libraries.


 Introduction to Spring Python