
In this article we will see how to use Java Persistence API (JPA) in NetBeans 6.1 with in a Java application. The JPA was first introduced as part of the Java EE 5 platform. This article will not provide any of the theoretical information about JPA.
Software used
- NetBeans IDE 6.1
- JDK version 5.0/6.0
- MySql 5.0
Creating a database in MySql 5.0
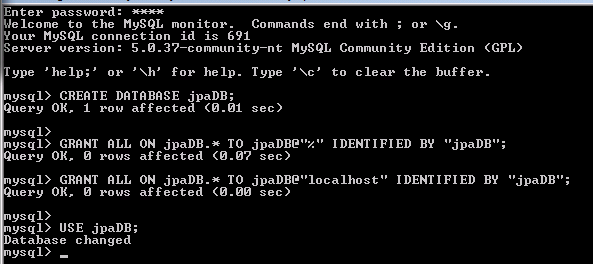
To start with first of all we will have to create a database in MySql. Let us name the database as “jpaDB”. To create a database we will execute the following in the mysql command line prompt.
CREATE DATABASE jpaDB;

GRANT ALL ON jpaDB.* TO jpaDB@"%" IDENTIFIED BY "jpaDB";
GRANT ALL ON jpaDB.* TO jpaDB@"localhost" IDENTIFIED BY "jpaDB";

USE jpaDB;
Set up a connection to a MySQL database from NetBeans IDE 6.1
NetBeans IDE 6.1 comes with support for the MySQL database. To set up MySql properly in Netbeans IDE 6.1 follow the steps below.
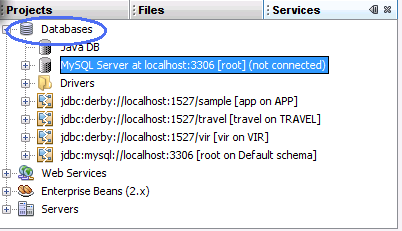
- 1. In Services window expand Databases node. See the screen shot below.
- 2. Right click on MySQL server node. MySQL Server Properties dialog window opens.
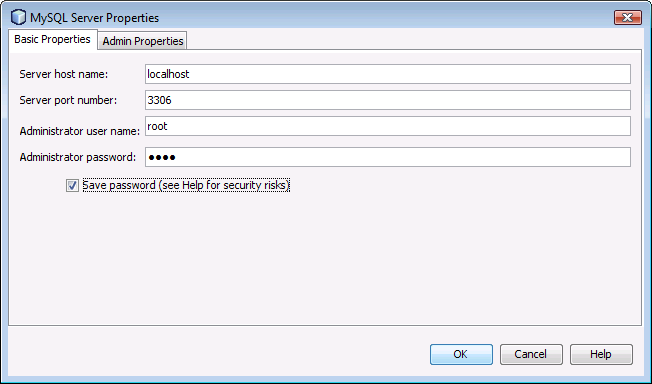
- 3. Already host name, port number and admin user name will be pre populated in the dialog. If not then fill in properties and click on ok.
Note: Before you can connect to a MySQL Database Server, you must first ensure that the MySQL Database Server is running on your machine. The MySQL Server node in the Service indicates whether the MySQL Database Server is connected, as shown in the following image.
- 4. After starting the Database Server on your machine, start the MySQL Database Server in the IDE by right-clicking the MySQL Server node and choosing Start.
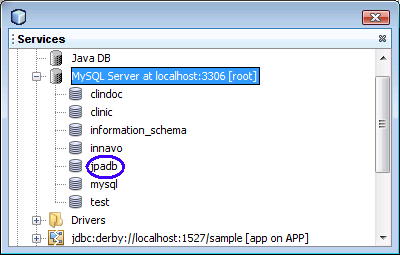
- 5. Now expand the MySQL server node. We can see the database which we created using command prompt. (We also can create the database using netbeans itself. Since we have created the database already we don’t cover those steps in this artical).
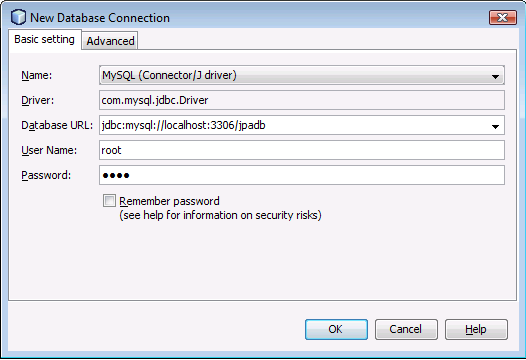
- 6. Now we will connect the database as shown below in the figure. Enter the password for the user if there is one, then click OK to create the new database connection. Click OK again if no schema is required.
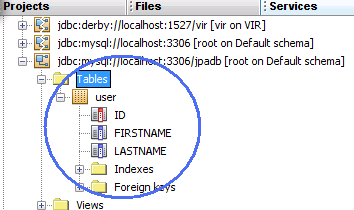
- 7. we can see the database appearing in the services window.
Creating Table in MySql 5.0
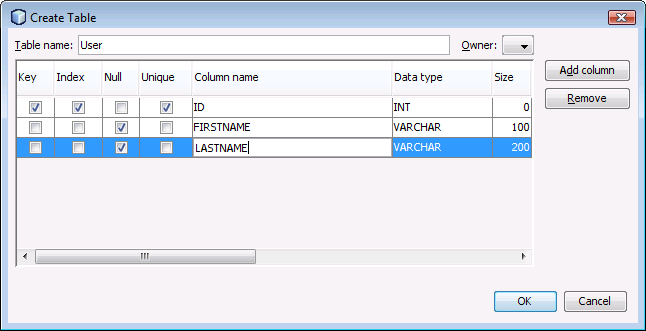
Now we will create a table and name it as “USER”.
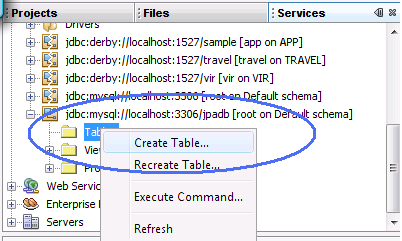
In the services window expand the database (See the figure below)
we created in the previous section. Right click on the table node.
select create table.
Invoking on create table node will result in create table dialog.
This window will halp us in creating the table with ease as shown in the below diagram.
Create a JavaApplication in NetBeans 6.1
Now create a java application in NetBeans IDE. Let us name the application as MyJPAApplication.
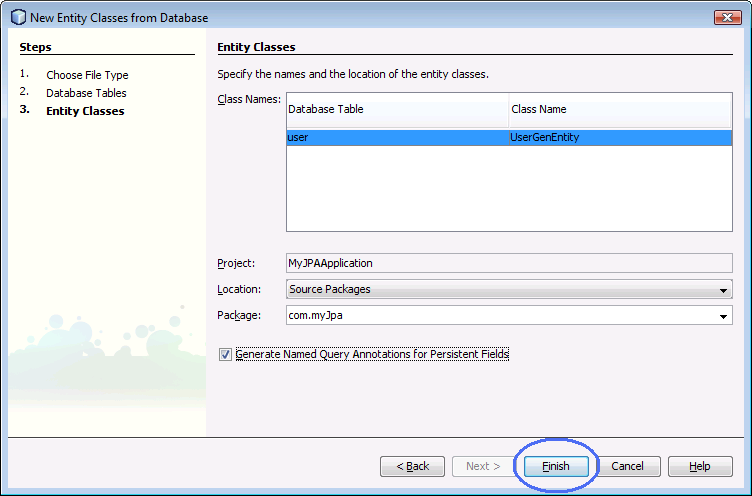
Next step is to generate a Entity class which will map to User table.
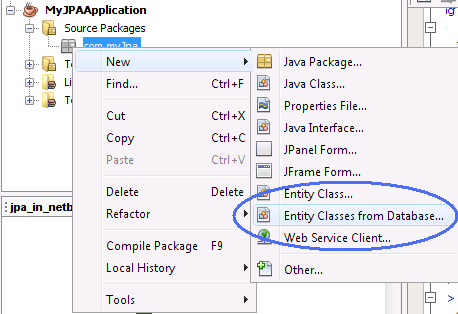
Select the database created as shown in the below figure.
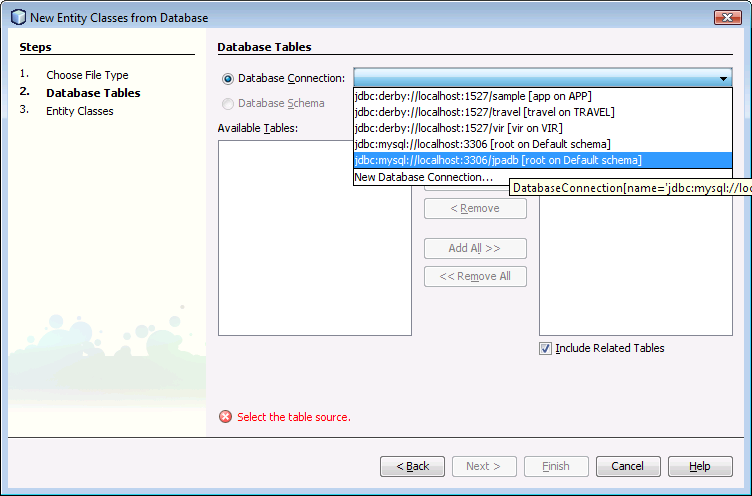
You can now see the tables available in the database will be listed in the Available Tables menu.
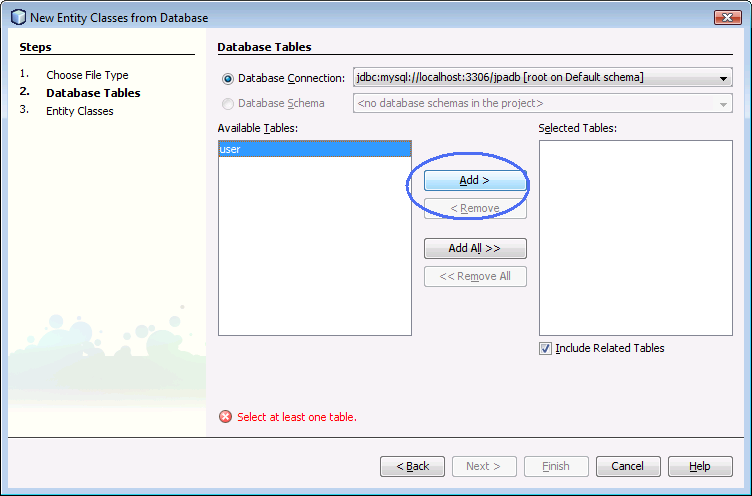
Select the user table and click on Add to move it to Selected tables menu.
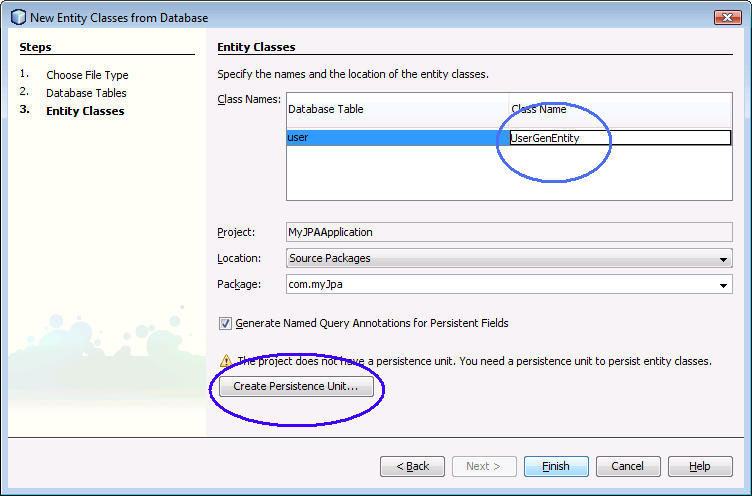
Change the class name in the next wizard as UserGenEntity. Then click on Create Persistence Unit button.
In the create persistant unit wizard, change the Table Generation Strategy option to Create.
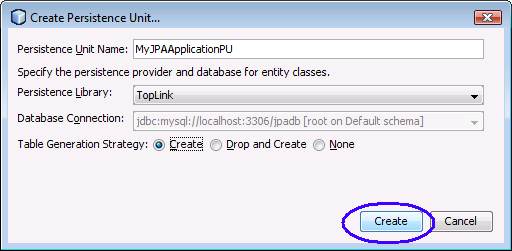
Now in the final wizard there will not be any information or warning messages shown. Then click on finish.
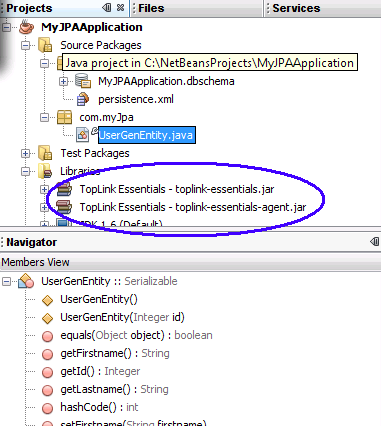
Once you clicked on finish. you can see the class named UserGenEntity getting generated in the Projects window of the IDE. You can also see the TopLink libraries getting added to the Libraries node as shown below.
Next step is to implement a Manager Class which handles the JPA persistence-context. That means this class is responsible to provide CRUD functionality for your instances and to communicate with your database.
We will name this manager class as UserManager. UserManager code is given in the below listing.
Sample JPA Application
package com.myJpa;

import java.util.List;
import javax.persistence.EntityManager;
import javax.persistence.EntityManagerFactory;
import javax.persistence.Query;

/**
 *
 * @author Sri hari
 */
public class UserManager {

    private EntityManager em;

    public UserManager(EntityManagerFactory emf) {
        em = emf.createEntityManager();
    }

    public void createUser(UserGenEntity user) {
        em.getTransaction().begin();
        em.persist(user);
        em.getTransaction().commit();
    }

    public UserGenEntity searchById(Integer id) {
        return em.find(UserGenEntity.class, id);
    }

    public void updateUser(UserGenEntity user) {
        em.getTransaction().begin();
        em.merge(user);
        em.getTransaction().commit();
    }

    public void removeUser(UserGenEntity user) {
        em.getTransaction().begin();
        em.remove(user);
        em.getTransaction().commit();
    }

    public List getAll() {
        Query query = em.createQuery("select a from UserGenEntity a");
        List list = query.getResultList();
        return list;
    }

    public void close() {
        em.close();
    }
}
Code List has the following methods:
- createUser — this method is used to create a user in the database.
- searchById — this method is used to search a user by ID.
- updateUser — this method is used to update a user from the table.
- removeUser — this method is used to remove a user from the table.
- getAll — this method is used to get all the users from the table.
Testing the JPA code
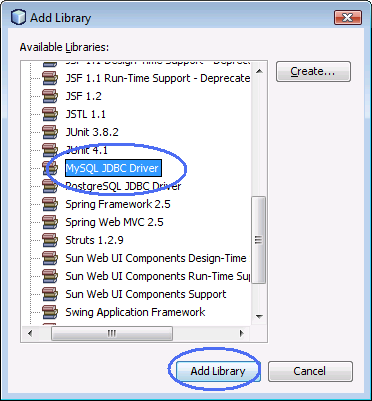
Now its time to test the code and see how it works. Before that don’t forget to add the driver for MySQL to your project library.
Testing can be done using JUnit or a simple Java class with main method. Here we will create a simple java class with main method to test our code.
package com.myJpa;

import java.util.List;
import javax.persistence.EntityManager;
import javax.persistence.EntityManagerFactory;
import javax.persistence.Persistence;

/**
 *
 * @author Sri hari
 */
public class TestJPA {

    private UserManager um;
    private EntityManager em;
    private EntityManagerFactory emf;
    private static final UserGenEntity user1 = new UserGenEntity(1, "Muthu", "Dhanagopal");
    private static final UserGenEntity user2 = new UserGenEntity(2, "Sri", "Hari");

    protected void setUp() throws Exception {
        emf = Persistence.createEntityManagerFactory("MyJPAApplicationPU");
        em = emf.createEntityManager();
        um = new UserManager(emf);
    }

    protected void close() throws Exception {
        um.close();
        em.close();
        emf.close();
    }

    public void test() {
        um.createUser(user1);
        UserGenEntity user = um.searchById(1);
        System.out.println("After creation of user in table");
        System.out.println("Firstname: " + user.getFirstname());
        System.out.println("Lastname: " + user.getLastname());

        user.setFirstname("Muthukumar");
        um.updateUser(user);

        user = um.searchById(1);
        System.out.println("After update.");
        System.out.println("Firstname: " + user.getFirstname());
        System.out.println("Lastname: " + user.getLastname());

        System.out.println("Adding one more record");
        um.createUser(user2);

        List list = um.getAll();
        System.out.println("Number of users: " + list.size());
    }

    public static void main(String args[]) {
        System.out.println("Inside TestJPA main");
        TestJPA testJPA = new TestJPA();
        try {
            testJPA.setUp();
            testJPA.test();
            testJPA.close();
        } catch (Exception e) {
            e.printStackTrace();
        }
        System.out.println("End of TestJPA main");
    }
}
Result
init:
deps-jar:
compile-single:
run-single:
Inside TestJPA main
[TopLink Info]: 2008.07.27 09:42:50.500--ServerSession(16602326)--TopLink, version: Oracle TopLink Essentials - 2.0.1 (Build b09d-fcs (12/06/2007))
[TopLink Info]: 2008.07.27 09:42:52.253--ServerSession(16602326)--file:/C:/NetBeansProjects/MyJPAApplication/build/classes/-MyJPAApplicationPU login successful
[TopLink Warning]: 2008.07.27 09:42:52.410--ServerSession(16602326)--Exception [TOPLINK-4002] (Oracle TopLink Essentials - 2.0.1 (Build b09d-fcs (12/06/2007))): oracle.toplink.essentials.exceptions.DatabaseException
Internal Exception: com.mysql.jdbc.exceptions.jdbc4.MySQLSyntaxErrorException: Table 'user' already exists
Error Code: 1050
Call: CREATE TABLE user (ID INTEGER NOT NULL, FIRSTNAME VARCHAR(255), LASTNAME VARCHAR(255), PRIMARY KEY (ID))
Query: DataModifyQuery()
After creation of user in table
Firstname: Muthu
Lastname: Dhanagopal
After update.
Firstname: Muthukumar
Lastname: Dhanagopal
Adding one more record
Number of users: 2
[TopLink Info]: 2008.07.27 09:42:52.864--ServerSession(16602326)--file:/C:/NetBeansProjects/MyJPAApplication/build/classes/-MyJPAApplicationPU logout successful
End of TestJPA main
BUILD SUCCESSFUL (total time: 7 seconds)
Summary
In this article you have learnt how to develop a JPA persistence layer using Java Application. This is not the end, Still miles to go.
 NULL and NOT NULL comparison in the Hibernate API