
When you define a bean in the configuration file, you are just defining the structure of the bean or it is just a class. With that definition, you can create any number of instances. Here the advantage of the bean is that, you are not only allowed to define the dependencies for the beans, you also can set the scope for the beans. The spring framework supports following five scopes. Out of which three scopes are supported only in web ApplicationContext.
- Singleton
- Prototype
- Request
- Session
- Global Session
I’ve already covered Singleton and Prototype in the post “Spring bean with examples”. Now let’s see an example of how to use Request and Session scopes.
- [download id=”17″]
Note:Request, Session and Global Session scopes are valid in the context of a web-aware Spring ApplicationContext. This means that you can only use these scoped beans in a an application deployed to a web server. Spring can be used in applications that run in standard JVMs along with applications that run in servlet containers (Tomcat, etc). Request, Session and Global session however, only exists in web servers so it has no meaning if the application is running in a standard desktop environment.
If you use these scopes with regular Spring IoC containers such as the ClassPathXmlApplicationContext, you get an IllegalStateException complaining about an unknown bean scope.
also read: follow us on @twitter and @facebook
- Spring Tutorials ( Collection for Spring reference documentations)
- Spring Framework Interview Questions
- Email Integration in Spring Framework
- Introduction to Spring REST Services
Request and Session Scope Example
Request scopes a bean definition to an HTTP request. Only valid in the context of a web-aware Spring ApplicationContext. Session scopes a bean definition to an HTTP session. Only valid in the context of a web-aware Spring ApplicationContext.
Step 1: Create Project
Let us have working Eclipse IDE in place. Create a Dynamic Web Project with a name Spring-Req-Session-scope-Eg. Follow the option File -> New -> Project ->Dynamic Web Project and finally select Dynamic Web Project wizard from the wizard list. Now name your project as Spring-Req-Session-scope-Eg using the wizard window.
Step 2: Add external libraries
Drag and drop below mentioned Spring and other libraries into the folder WebContent/WEB-INF/lib:
- antlr-2.7.2.jar
- aopalliance-1.0.jar
- org.springframework.web.servlet-3.2.2.RELEASE.jar
- spring-aop-3.2.2.RELEASE.jar
- spring-aspects-3.2.2.RELEASE.jar
- spring-beans-3.2.2.RELEASE.jar
- spring-context-support-3.2.2.RELEASE.jar
- spring-context-3.2.2.RELEASE.jar
- spring-core-3.2.2.RELEASE.jar
- spring-expression-3.2.2.RELEASE.jar
- commons-logging-1.1.1.jar
- spring-web-3.2.2.RELEASE.jar
Step 3: Create bean and Controller
Create the following packages under src folder. (Right click onsrc -> New -> Package -> package-name)
 com.javabeat.beans
 com.javabeat.controller and
 com.javabeat.impl
Create the the bean files com\javabeat\beans\HelloRequestScopeData.java (for request scope) and com\javabeat\beans\HelloSessionScopeData.java (for session scope). These beans are wired into a basic Spring MVC application. Contents of these files are as below:
HelloRequestScopeData.java
package com.javabeat.beans;

public interface HelloRequestScopeData {
	public String getDate();
}
HelloSessionScopeData.java
package com.javabeat.beans;

public interface HelloSessionScopeData {
	public String getDate();
}
Create the bean implementation file com\javabeat\impl\HelloRequestScopeDataImpl.java and com\javabeat\impl\HelloSessionScopeDataImpl.java. Contents of these files are as below:
HelloRequestScopeDataImpl.java
package com.javabeat.impl;

import java.util.Date;
import com.javabeat.beans.HelloRequestScopeData;

public class HelloRequestScopeDataImpl implements HelloRequestScopeData {

	private final Date date;

	public HelloRequestScopeDataImpl(Date date) {
		this.date = date;
	}

	@Override
	public String getDate() {
		return date.toString();
	}
}
HelloSessionScopeDataImpl.java
package com.javabeat.impl;

import java.util.Date;
import com.javabeat.beans.HelloSessionScopeData;

public class HelloSessionScopeDataImpl implements HelloSessionScopeData {
	private final Date date;

	public HelloSessionScopeDataImpl(Date date) {
		this.date = date;
	}

	@Override
	public String getDate() {
		return date.toString();
	}
}
Create the controller com\javabeat\controller\HelloController.java, the contents are as below:
HelloController.java
package com.javabeat.controller;

import org.springframework.beans.factory.annotation.Autowired;
import org.springframework.stereotype.Controller;
import org.springframework.ui.Model;
import org.springframework.web.bind.annotation.RequestMapping;

import com.javabeat.beans.HelloRequestScopeData;
import com.javabeat.beans.HelloSessionScopeData;

@Controller
public class HelloController {

	@Autowired
	private HelloRequestScopeData requestscopehellodata;

	@Autowired
	private HelloSessionScopeData sessionscopehellodata;

	@RequestMapping(value = "/")
	public String hellodata(Model model) {
		model.addAttribute("requestscopedate", requestscopehellodata.getDate());
		model.addAttribute("sessionscopedate", sessionscopehellodata.getDate());

		/* return to view "hello.jsp" */
		return "hello";
	}
}
This controller has a dependency of type HelloRequestScopeData and HelloSessionScopeData. We display the date from bean in both requets and session scope. The veiw is returned to “hello.jsp”.
Note: In the above example, @Autowired annotation will search for the matching type in the spring beans and automatically wire the suitable bean instance to the object. You need not declare any other explicit mentioning of the injecting the objects, @Autowired is most powerful annotation to decide the suitable object. @RequestMapping is the context path definition for the request. This annotation maps all the matching request from that path will be send to this particular controller method. For more details please read spring mvc tutorials.
Step 4: Create Configuration files
web.xml
<?xml version="1.0" encoding="UTF-8"?>
<web-app xmlns:xsi="http://www.w3.org/2001/XMLSchema-instance"
xmlns="http://java.sun.com/xml/ns/javaee"
xmlns:web="http://java.sun.com/xml/ns/javaee/web-app_2_5.xsd"
xsi:schemaLocation="http://java.sun.com/xml/ns/javaee
http://java.sun.com/xml/ns/javaee/web-app_2_5.xsd"
id="WebApp_ID" version="2.5">
  <display-name>Spring-Req-Session-scope-Eg</display-name>
  <servlet>
    <servlet-name>HelloWeb</servlet-name>
    <servlet-class>
         org.springframework.web.servlet.DispatcherServlet
      </servlet-class>
    <load-on-startup>1</load-on-startup>
  </servlet>
  <servlet-mapping>
    <servlet-name>HelloWeb</servlet-name>
    <url-pattern>/</url-pattern>
  </servlet-mapping>
  <listener>
    <listener-class>
		org.springframework.web.context.request.RequestContextListener
	</listener-class>
  </listener>
</web-app>
HelloWeb-servlet.xml
<beans xmlns="http://www.springframework.org/schema/beans"
   xmlns:context="http://www.springframework.org/schema/context"
   xmlns:xsi="http://www.w3.org/2001/XMLSchema-instance"
   xmlns:mvc="http://www.springframework.org/schema/mvc"
   xmlns:aop="http://www.springframework.org/schema/aop"
   xsi:schemaLocation="
   http://www.springframework.org/schema/beans
   http://www.springframework.org/schema/beans/spring-beans-3.0.xsd
   http://www.springframework.org/schema/context
   http://www.springframework.org/schema/context/spring-context-3.0.xsd
   http://www.springframework.org/schema/aop
   http://www.springframework.org/schema/aop/spring-aop-3.0.xsd
   http://www.springframework.org/schema/mvc
   http://www.springframework.org/schema/mvc/spring-mvc-3.0.xsd">
 <mvc:annotation-driven />
<bean
  class="org.springframework.web.servlet.view.InternalResourceViewResolver">
  <property name="prefix" value="/WEB-INF/jsp/" />
  <property name="suffix" value=".jsp" />
</bean>

<context:component-scan base-package="com.javabeat" />
<context:annotation-config />
<bean id="requestscope" class="com.javabeat.impl.HelloRequestScopeDataImpl" scope="request">
  <constructor-arg>
    <bean class="java.util.Date" />
  </constructor-arg>
   <aop:scoped-proxy proxy-target-class="false" />
</bean>
<bean id="sessionscope" class="com.javabeat.impl.HelloSessionScopeDataImpl" scope="session">
  <constructor-arg>
    <bean class="java.util.Date" />
  </constructor-arg>
   <aop:scoped-proxy proxy-target-class="false" />
</bean>
</beans>
Here two beans are defined one has “request” (for bean HelloRequestScopeDataImpl) scope and other “session” (for bean HelloSessionScopeDataImpl) scope. The request scope tells Spring to instantiate a new HelloRequestScopeDataImpl bean with each Web request, and to make that bean available only within the context of that Web request. The session scope tells Spring to instantiate a new HelloSessionScopeDataImpl bean with each Web session, and to make that bean available only within the context of that Web session.
The <aop:scoped-proxy /> element tells Spring that this bean is not to be injected as a dependency directly, but instead an AOP proxy of this bean is to be injected in its place. The proxy-target-class=”false” attribute tells Spring not to use a CGLIB proxy, but a JDK dynamic proxy instead.
A simple view displays the Date, one which is created for each request the controller receives and one is for each session. The contents of the file are as below:
hello.jsp
<%@page language="java" contentType="text/html; charset=ISO-8859-1"
    pageEncoding="ISO-8859-1"%>
<!DOCTYPE html PUBLIC "-//W3C//DTD HTML 4.01 Transitional//EN"
"http://www.w3.org/TR/html4/loose.dtd">
<html>
<head>
<meta http-equiv="Content-Type" content="text/html; charset=ISO-8859-1">
<title>Hello World</title>
</head>
<body>
   <h2>---Request Scope Date----</h2>
   <h2>${requestscopedate}</h2>
   <h2>---------------------------</h2>
   <h2>---Session Scope Date----</h2>
   <h2>${sessionscopedate}</h2>
   <h2>---------------------------</h2>
</body>
</html>
Step 5: Deploy and Execute
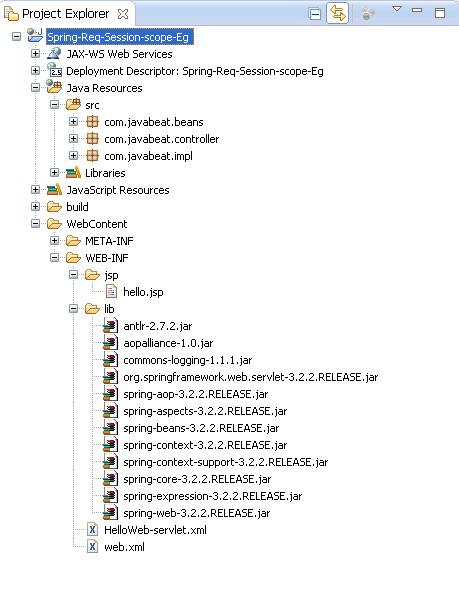
The final structure of the project is as show below:
Once you are done with creating source and configuration files, export your application. Right click on your application(Spring-Req-Session-scope-Eg) and use Export > WAR File option and save your Spring.war file in Tomcat’s webapps folder.
Step 6: Output
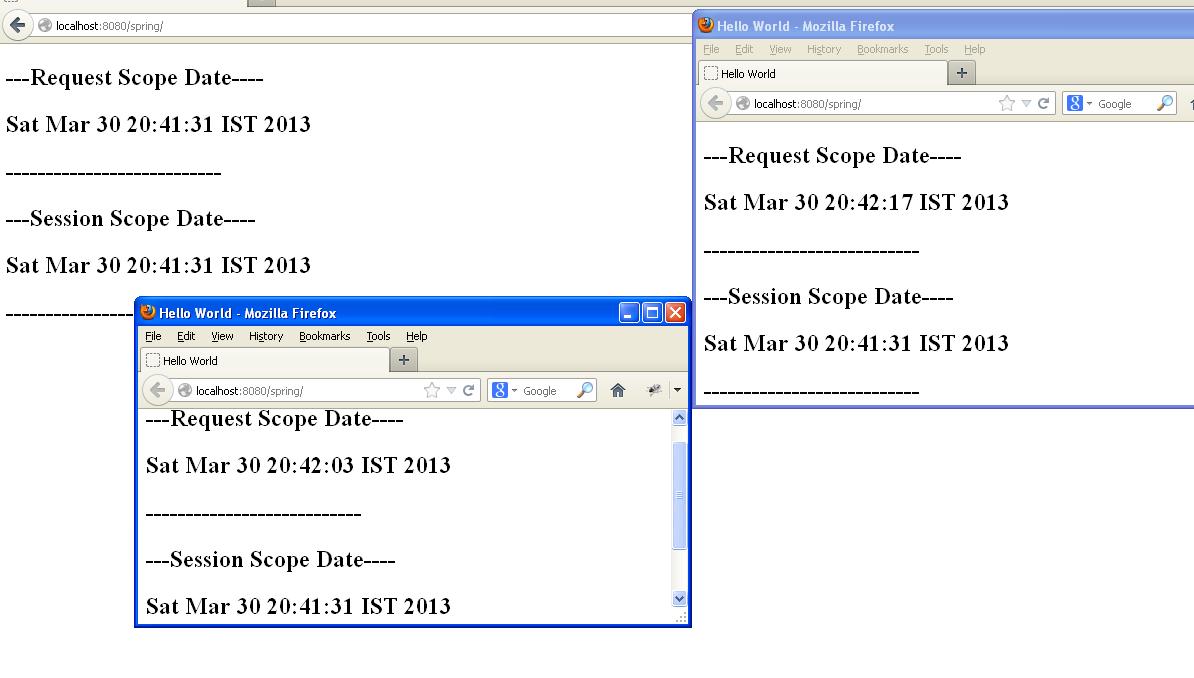
Now start your Tomcat server and make sure you are able to access other web pages from webapps folder using a standard browser. Now try to access the URL http://localhost:8080/spring/ and if everything is fine with your Spring Web Application, you should see the following result:
Global Session Scope
The global session scope is similar to the Session scope and really only makes sense in the context of portlet-based web applications. The portlet specification defines the notion of a global Session that is shared among all of the various portlets that make up a single portlet web application. Beans defined at the global session scope are bound to the lifetime of the global portlet Session.
- [download id=”17″]
Summary
In my earlier post I have explained about “Spring bean with examples”. In this post we saw an example of how to use the scopes Request and Session. My next post shall cover creating custom scope for Spring beans. If you have any questions on scopes, please write it on the comments section. If you are interested in receiving the future articles, please subscribe here.
 Spring bean scopes (Singleton and Prototype) with example