This tutorial highlights the new features added as part of the spring boot 1.3.0 for caching support. Caching has been supported by spring boot, but there is no auto configuration option for the caching in spring boot until now. The new Spring Boot release 1.3.0 has introduced the following features that makes easier to use the caching within spring boot powered applications:
- Auto configuration is supported for the caching.
- Spring boot actuator adds caching metrics to the /metrics endpoint.

In this tutorial, I have explained the above two new features as part of the caching support in spring boot applications. I have used the same example application used as part of the Spring Data Tutorial and added the caching implementation (ehcache) on top of the same example. The revised implementation of the example application I have uploaded at the end of this tutorial for your download. This tutorial just explains the caching specific pieces. Hope that helps. If you have any questions, please write it in the comments section.
Caching Auto Configuration

Spring Boot simplifies the configuration of caching implementation with auto-configuration support. If you are not familiar with the word auto-configuration, here is the definition: Auto-configuration in spring boot searches the libraries and configuration files in the classpath and initialize the required dependency beans at the application start up. This eliminates the need for manually configuring the beans to instantiate and ready for the use.
For example: If you have the ehcache.xml in the classpath and you have the ehcache 2.x libraries present, then spring boot will configure the ehcache as the caching implementation for your application by initializing the cache managers for ehcache.
Prior to the auto-configuration, you would require the following lines of code in the spring boot configuration file:
@SpringBootApplication
@EnableCaching
public class MyBooks {
    @Bean
    public CacheManager cacheManager() { ...}

    ...
}
With Spring Boot 1.3.0, the last step of adding the bean definitions also bean eliminated. The following are the steps to enable ehcache for your application:
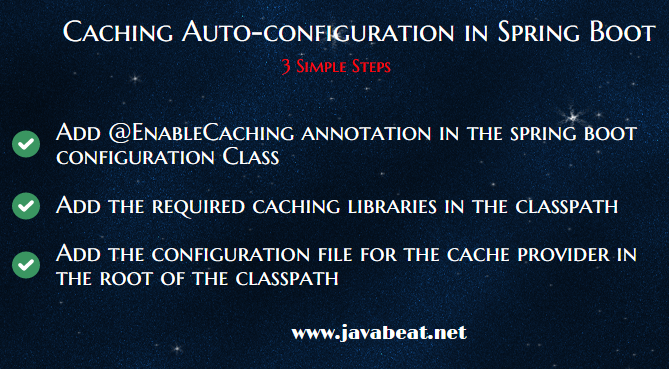
- Add
@EnableCachingannotation in the spring boot configuration class. This annotation is the indicator for enabling the caching mechanism in your application. - Next step is to add the required libraries in the classpath. If you are using the ehcache as the cache implementation, then add the dependency to the
POM.xmlfile. - Next step is to add the configuration file for the cache provider. If you are using the ehcache, the add the
ehcache.xmlat the root of the classpath.
Spring boot tries to detect the following cache providers in the order given below:
- Generic
- EhCache 2.x
- Hazelcast
- Infinispan
- JCache (JSR-107)
- Redis
- Guava
- Simple
If the spring boot finds more than once cache provider in the classpath, in that case the cache provider must be explicitly specified. Add the following entries to the application.properties file:
# Only necessary if more than one provider is present
spring.cache.ehcache.provider=net.sf.ehcache.CacheManager
spring.cache.ehcache.config=classpath:config/another-config.xml
Caching Metrics in Spring Boot Actuator
/metrics endpoint exposes the various metrics about the running application. Spring Boot 1.3.0 adds the details about the cache implementation also as part of the /metrics endpoint. The following details are exposed:
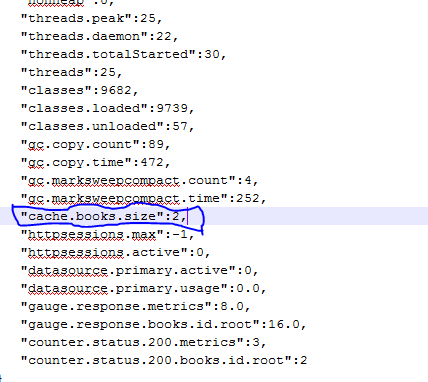
- The current size of the cache (cache.xxx.size)
- Hit ratio (cache.xxx.hit.ratio)
- Miss ratio (cache.xxx.miss.ratio)
Note: The cache metrics may be different for each provider. So, you have to check the provider documentation for more details about how the metrics about hit / miss ratios are exposed by the provider. When I have tried the sample application, I could not get the hit / miss ratio for ehcache, it looks there is some issue at present. You can see the size of the cache display in the below screenshot. I will update the tutorial with more details.

Example Application
Now we review the example application that supports the auto-configuration for caching and exposes the cache metrics. As I have told, this example is the extension of the Spring Data Tutorial. Refer the spring data tutorial if you want to understand how spring data works.
Here is the updated SpringBootApplication.java. The only update is @EnableCaching annotation.
@Configuration
@SpringBootApplication
@EnableJpaRepositories
@EnableCaching
public class Application {
	public static void main(String[] args) {
		SpringApplication.run(Application.class, args);
	}

}
You have to enable caching for the one method. The similar way you can do for other methods. If you are looking for more details about the spring caching abstraction, please read our spring cache tutorial.
@Cacheable ("books")
	public Book findOne(long id);
Just add ehcache.xml file in the root of the classpath:
<?xml version="1.0" encoding="UTF-8"?>
<ehcache>
	<diskStore path="java.io.tmpdir" />
	<defaultCache maxElementsInMemory="10" eternal="false" timeToIdleSeconds="120" timeToLiveSeconds="120" overflowToDisk="true" />
	<cache name="books" maxElementsInMemory="50" eternal="false" overflowToDisk="true" timeToIdleSeconds="0" timeToLiveSeconds="86400" />
</ehcache>
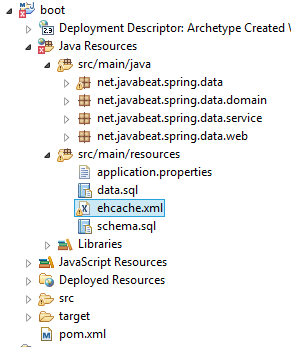
The project structure would look like this:

When spring boot initializes the ehcache, you would see the following messages in the console which confirms the initialization of ehcache by the example application.
Bean 'org.springframework.cache.annotation.ProxyCachingConfiguration' of type [class org.springframework.cache.annotation.ProxyCachingConfiguration$$EnhancerBySpringCGLIB$$ce3ea348] is not eligible for getting processed by all BeanPostProcessors (for example: not eligible for auto-proxying)
Bean 'org.springframework.boot.autoconfigure.cache.CacheAutoConfiguration' of type [class org.springframework.boot.autoconfigure.cache.CacheAutoConfiguration$$EnhancerBySpringCGLIB$$866a36c] is not eligible for getting processed by all BeanPostProcessors (for example: not eligible for auto-proxying)
Bean 'spring.cache.CONFIGURATION_PROPERTIES' of type [class org.springframework.boot.autoconfigure.cache.CacheProperties] is not eligible for getting processed by all BeanPostProcessors (for example: not eligible for auto-proxying)
Bean 'org.springframework.boot.autoconfigure.cache.CacheManagerCustomizers' of type [class org.springframework.boot.autoconfigure.cache.CacheManagerCustomizers] is not eligible for getting processed by all BeanPostProcessors (for example: not eligible for auto-proxying)
Bean 'org.springframework.boot.autoconfigure.cache.EhCacheCacheConfiguration' of type [class org.springframework.boot.autoconfigure.cache.EhCacheCacheConfiguration$$EnhancerBySpringCGLIB$$f507a8aa] is not eligible for getting processed by all BeanPostProcessors (for example: not eligible for auto-proxying)
Bean 'ehCacheCacheManager' of type [class net.sf.ehcache.CacheManager] is not eligible for getting processed by all BeanPostProcessors (for example: not eligible for auto-proxying)
Bean 'cacheManager' of type [class org.springframework.cache.ehcache.EhCacheCacheManager] is not eligible for getting processed by all BeanPostProcessors (for example: not eligible for auto-proxying)
cacheAutoConfigurationValidator' of type [class org.springframework.boot.autoconfigure.cache.CacheAutoConfiguration$CacheManagerValidator] is not eligible for getting processed by all BeanPostProcessors (for example: not eligible for auto-proxying)
Download the Source Code
Summary
The above sections explains you the auto configuration of caching in spring boot applications and how to expose the caching metrics using the spring boot actuator. This tutorial primarily focused on the ehcache implementation, I would add the other caching provider details in future. Stay tune to receive more updates on spring boot caching.
Thank you for reading my blog!! Happy Reading and Have fun!!

 Array Vs ArrayList in Java