
In this tutorial I am going to explain your how to use SQL Databases and Spring Boot together. If you are working in a Spring Framework projects, you should know very well about how to use SQL databases and Spring Boot for persisting application data.
SQL Databases are an integral part of any application being development. They help in persisting application data. SQL Databases provide advanced support for querying data using the Structured Query Language(SQL). Spring Boot provides great support for interacting with SQL databases with minimal or no XML configurations. In this article we will look at the following:
- Configuring in memory database and fetching data using JdbcTemplate
- Configuring production database and fetching data using JdbcTemplate
- Using JPA and Spring Data
In Memory Database Using JdbcTemplate
The fastest way to test something is to make use of embedded db. This helps in getting started with the application without much hassles of installing the db. Let us see how we can use embedded db and also how we can initialize the schema we need to be created in the embedded db. First let us add the dependencies to pom.xml:
- Read : Apache Maven for Beginners
<dependency>
  <groupId>org.springframework.boot</groupId>
  <artifactId>spring-boot-starter</artifactId>
</dependency>
<dependency>
  <groupId>org.springframework.boot</groupId>
  <artifactId>spring-boot-starter-jdbc</artifactId>
</dependency>
<dependency>
  <groupId>org.hsqldb</groupId>
  <artifactId>hsqldb</artifactId>
  <scope>runtime</scope>
</dependency>
- In the above dependencies we have included the JDBC dependency – this gives us JdbcTemplate and other JDBC libraries, the org.hsqldb dependency adds embedded hsqldb.
- We need not add any configurations to connect to this embedded db, its all managed by Springboot.
- These embedded DBs are in-memory and each time the application shuts down the schema and data gets erased. One way to keep schema and data in the in-memory is to populate it during application startup. This is taken care by Springboot.
- One of the approaches is to create
schema.sqlanddata.sqlfiles in the application classpath. - Spring JDBC uses these sql files to create schema and populate data into the schema. There are other techniques which are listed here.
One can create mulptiple schema.sql and data.sql files, one for each db platform. So we can have schema-hsqldb.sql, data-hsqldb.sql, schema-mysql.sql and so on. And the file to be picked is decided by the value assigned to the property spring.datasource.platform. In this post we are going to create a schema-hsqldb.sql file with the following contents:
CREATE TABLE person(
  first_name  VARCHAR(150),
  last_name   VARCHAR(150),
  age         INTEGER,
  place       VARCHAR(100)
);
Next is to create application-local.properties file to define the values for application properties. Please read our previous articles about external configurations. Below is the contents for application-local.properties:
spring.datasource.platform=hsqldb
Next is to create the Person model class:
package net.javabeat;

public class Person {
  private String firstName;
  private String lastName;
  private int age;
  private String place;
  public String getFirstName() {
    return firstName;
  }
  public void setFirstName(String firstName) {
    this.firstName = firstName;
  }
  public String getLastName() {
    return lastName;
  }
  public void setLastName(String lastName) {
    this.lastName = lastName;
  }
  public int getAge() {
    return age;
  }
  public void setAge(int age) {
    this.age = age;
  }
  public String getPlace() {
    return place;
  }
  public void setPlace(String place) {
    this.place = place;
  }

  public String toString(){
    StringBuilder builder = new StringBuilder();
    builder.append(this.getFirstName())
      .append(", ")
      .append(this.getLastName())
      .append(", ")
      .append(this.getPlace())
      .append(", ")
      .append(this.getAge());

    return builder.toString();
  }

}
Next is to create a service class PersonService which makes use of JdbcTemplate to insert data and retrieve data from hsqldb. There are two method in the service class- addPerson and getAllPerson. addPerson adds a new row to the person table and getAllPerson fetches all the rows in the person table. Below is the PersonService class definition:
package net.javabeat;

import java.sql.ResultSet;
import java.sql.SQLException;
import java.util.List;

import org.springframework.beans.factory.annotation.Autowired;
import org.springframework.jdbc.core.JdbcTemplate;
import org.springframework.jdbc.core.RowMapper;
import org.springframework.stereotype.Service;

@Service
public class PersonService {

  @Autowired
  private JdbcTemplate jdbcTemplate;

  public int addPerson(Person person){
    String sql = "INSERT INTO person(first_name, last_name, age, place) VALUES(?,?,?,?)";
    return jdbcTemplate.update(sql, person.getFirstName(),
        person.getLastName(), person.getAge(), person.getPlace());
  }

  public List<Person> getAllPerson(){
    return jdbcTemplate.query("SELECT * FROM person", new RowMapper<Person>(){

      public Person mapRow(ResultSet rs, int arg1) throws SQLException {
        Person p = new Person();
        p.setAge(rs.getInt("age"));
        p.setFirstName(rs.getString("first_name"));
        p.setLastName(rs.getString("last_name"));
        p.setPlace(rs.getString("place"));
        return p;
      }

    });
  }
}
Creation of DataSource instance, JdbcTemplate instance is all taken care by Spring Boot. Next is creation of the main class which launches the SpringApplication. Below is the definition of SpringbootSqlDemo class:
package net.javabeat;

import org.slf4j.Logger;
import org.slf4j.LoggerFactory;
import org.springframework.beans.factory.annotation.Autowired;
import org.springframework.boot.CommandLineRunner;
import org.springframework.boot.SpringApplication;
import org.springframework.boot.autoconfigure.SpringBootApplication;

@SpringBootApplication
public class SpringbootSqlDemo implements CommandLineRunner{

  Logger logger = LoggerFactory.getLogger(SpringbootSqlDemo.class);

  @Autowired
  PersonService personService;

  public void run(String... args) {
    Person person = new Person();
    person.setFirstName("FName");
    person.setLastName("LName");
    person.setAge(20);
    person.setPlace("Place");

    if ( personService.addPerson(person) > 0){
      logger.info("Person saved successfully");
    }

    for(Person p : personService.getAllPerson()){
      logger.info(p.toString());
    }

  }

  public static void main(String[] args) {
    SpringApplication.run(SpringbootSqlDemo.class, args);
  }

}
The above class implements CommandLineRunner interface so that it can run once the Spring Boot application context has been completely initialized. This allows for creation of instances of DataSource, JdbcTemplate, PersonService and other beans.
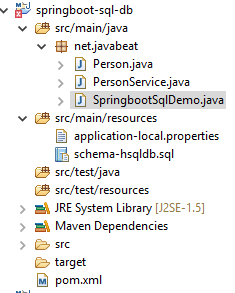
The run(String... args) method first inserts one row into the person table and then retrieves all the rows in the person table and logs them using the logger. So once we run the application we will be able to see the rows inserted. With all these new files the project structure looks like:
Let us run the application using the command: mvn spring-boot:run -Dspring.profiles.active=local. Below is the output snippet obtained after the application executes:
...
2015-08-20 19:50:00.704  INFO 5572 --- [tSqlDemo.main()] net.javabeat.SpringbootSqlDemo           : Person saved successfully
2015-08-20 19:50:00.719  INFO 5572 --- [tSqlDemo.main()] net.javabeat.SpringbootSqlDemo           : FName, LName, Place, 20
...
You can notice that a new row has been added to person table and also all the rows available in the table have been printed.
Production Database Configurations Using JdbcTemplate
In-memory databases have lot of restriction and are useful in the early stages of the application and that too in local environments. As the application development progresses we would need data to be present even after application ends.
In such cases we will configure an installed database. To illustrate this example we will use PostgreSql. One can download and install PostgreSql from here. Let us create a new profile and name it as stage. This profile will make use of PostgreSql. For this we have to create application-stage.properties as shown below:
spring.database.driverClassName=org.postgresql.Driver
spring.datasource.url=jdbc:postgresql://localhost:5433/postgres
spring.datasource.username=postgres
spring.datasource.password=postgres
The above are the connection url, username and password to connect to Postgres instance. We would have to create the person table in the Postgres instance.
We will also update the pom.xml to comment out the hsqldb dependency and instead add dependency to Postgres driver as shown below:
<!-- <dependency>
  <groupId>org.hsqldb</groupId>
  <artifactId>hsqldb</artifactId>
  <scope>runtime</scope>
</dependency> -->
<dependency>
  <groupId>org.postgresql</groupId>
  <artifactId>postgresql</artifactId>
  <version>9.4-1201-jdbc41</version>
</dependency>
Let us now run the application by using the command: mvn spring-boot:run -Dspring.profiles.active=stage. You can see the same output you saw with the above run:
2015-08-20 20:06:23.829  INFO 3676 --- [tSqlDemo.main()] net.javabeat.SpringbootSqlDemo           : Person saved successfully
2015-08-20 20:06:23.845  INFO 3676 --- [tSqlDemo.main()] net.javabeat.SpringbootSqlDemo           : FName, LName, Place, 20
But in this case if you run it multiple times then you will see multiple entries in the person table as shown below:
2015-08-20 20:54:21.914  INFO 6924 --- [tSqlDemo.main()] net.javabeat.SpringbootSqlDemo           : Person saved successfully
2015-08-20 20:54:21.945  INFO 6924 --- [tSqlDemo.main()] net.javabeat.SpringbootSqlDemo           : FName, LName, Place, 20
2015-08-20 20:54:21.945  INFO 6924 --- [tSqlDemo.main()] net.javabeat.SpringbootSqlDemo           : FName, LName, Place, 20
This is because the data is persistent in this case unlike hsqldb which is in-memory db.
JPA and Spring Data with Spring Boot
Above sections we saw interacting with db using JdbcTemplate. In this section we will see how the same can be achieved using Java Persistance API. Spring Data provides excellent mechanism to achieve the persistence using JPA. First step is to update pom.xml to add dependency on JPA as shown below:
<dependency>
  <groupId>org.springframework.boot</groupId>
  <artifactId>spring-boot-starter-data-jpa</artifactId>
</dependency>
Next we are going to introduce new column in the person table and also create a sequence to auto increment the value in the new column and bind that sequence to the new column being created. Below SQL commands help us achieve that:
CREATE SEQUENCE person_id_seq START WITH 1 INCREMENT BY 1;
ALTER TABLE person ADD COLUMN id numeric DEFAULT nextval('person_id_seq');
ALTER SEQUENCE person_id_seq OWNED BY person.id;
Next is to create an entity class that maps to the underlying table. Let us create PersonEntity as shown below:
package net.javabeat;

import java.io.Serializable;

import javax.persistence.Column;
import javax.persistence.Entity;
import javax.persistence.GeneratedValue;
import javax.persistence.GenerationType;
import javax.persistence.Id;
import javax.persistence.Table;

@Entity
@Table(name = "person")
public class PersonEntity implements Serializable{

  private static final long serialVersionUID = -1801714432822866390L;

  @Id
  @GeneratedValue(strategy = GenerationType.IDENTITY)
  private long id;

  @Column(name="first_name", nullable = false)
  private String firstName;

  @Column(name="last_name", nullable = false)
  private String lastName;

  private int age;

  private String place;

  protected PersonEntity(){

  }

  public PersonEntity(String firstName, String lastName, int age, String place){
    this.firstName = firstName;
    this.lastName = lastName;
    this.age = age;
    this.place = place;
  }

  public String toString(){
    StringBuilder builder = new StringBuilder();
    builder.append(this.getId()).append(", ")
      .append(this.getFirstName()).append(", ")
      .append(this.getLastName()).append(", ")
      .append(this.getPlace()).append(", ")
      .append(this.getAge());

    return builder.toString();
  }

  public long getId() {
    return id;
  }

  public void setId(long id) {
    this.id = id;
  }

  public String getFirstName() {
    return firstName;
  }

  public void setFirstName(String firstName) {
    this.firstName = firstName;
  }

  public String getLastName() {
    return lastName;
  }

  public void setLastName(String lastName) {
    this.lastName = lastName;
  }

  public int getAge() {
    return age;
  }

  public void setAge(int age) {
    this.age = age;
  }

  public String getPlace() {
    return place;
  }

  public void setPlace(String place) {
    this.place = place;
  }
}
Next is to create a repository class that will provide us with basic APIs to interact with db and also provide facility to add new APIs to interact with db. We will be using the CrudRepository provided by spring data. It provides us with APIs to do CRUD operations and some find operations like findAll, findOne, count. Let us create PersonRepository interface as shown below:
package net.javabeat;

import org.springframework.data.repository.CrudRepository;

public interface PersonRepository extends CrudRepository<PersonEntity, Long>{
}
Next is to update SpringbootSqlDemo class with code to access the db using the PersonRepository and PersonEntity. We will keep the JdbcTemplate code as well. Add the below code to the run method of the SpringbootSqlDemo class:
logger.info("Using JPA for insert and find");
PersonEntity personEntity = new PersonEntity("fName2", "lName2", 24, "Bangalore");
personEntity = personRepository.save(personEntity);
logger.info("Person with ID: " + personEntity.getId() + " saved successfully");

for ( PersonEntity pEntity : personRepository.findAll()){
  logger.info(pEntity.toString());
}
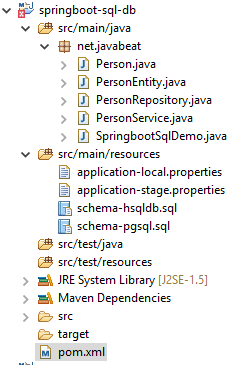
The application project structure looks something like:
 Let us run the application by using the command:
 mvn spring-boot:run -Dspring.profiles.active=stage. You can notice the data inserted and read from JdbcTemplate as well as the data inserted and read using JPA as shown below:
2015-08-21 06:18:59.054  INFO 13544 --- [tSqlDemo.main()] net.javabeat.SpringbootSqlDemo           : Person saved successfully
2015-08-21 06:18:59.054  INFO 13544 --- [tSqlDemo.main()] net.javabeat.SpringbootSqlDemo           : FName, LName, Place, 20
2015-08-21 06:18:59.054  INFO 13544 --- [tSqlDemo.main()] net.javabeat.SpringbootSqlDemo           : FName, LName, Place, 20
2015-08-21 06:18:59.054  INFO 13544 --- [tSqlDemo.main()] net.javabeat.SpringbootSqlDemo           : FName, LName, Place, 20
2015-08-21 06:18:59.054  INFO 13544 --- [tSqlDemo.main()] net.javabeat.SpringbootSqlDemo           : FName, LName, Place, 20
2015-08-21 06:18:59.054  INFO 13544 --- [tSqlDemo.main()] net.javabeat.SpringbootSqlDemo           : FName, LName, Place, 20
2015-08-21 06:18:59.054  INFO 13544 --- [tSqlDemo.main()] net.javabeat.SpringbootSqlDemo           : FName, LName, Place, 20
2015-08-21 06:18:59.054  INFO 13544 --- [tSqlDemo.main()] net.javabeat.SpringbootSqlDemo           : fName2, lName2, Bangalore, 24
2015-08-21 06:18:59.054  INFO 13544 --- [tSqlDemo.main()] net.javabeat.SpringbootSqlDemo           : FName, LName, Place, 20
2015-08-21 06:18:59.054  INFO 13544 --- [tSqlDemo.main()] net.javabeat.SpringbootSqlDemo           : Using JPA for insert and find
2015-08-21 06:18:59.101  INFO 13544 --- [tSqlDemo.main()] net.javabeat.SpringbootSqlDemo           : Person with ID: 9 saved successfully
2015-08-21 06:18:59.272  INFO 13544 --- [tSqlDemo.main()] net.javabeat.SpringbootSqlDemo           : 1, FName, LName, Place, 20
2015-08-21 06:18:59.272  INFO 13544 --- [tSqlDemo.main()] net.javabeat.SpringbootSqlDemo           : 2, FName, LName, Place, 20
2015-08-21 06:18:59.272  INFO 13544 --- [tSqlDemo.main()] net.javabeat.SpringbootSqlDemo           : 3, FName, LName, Place, 20
2015-08-21 06:18:59.272  INFO 13544 --- [tSqlDemo.main()] net.javabeat.SpringbootSqlDemo           : 4, FName, LName, Place, 20
2015-08-21 06:18:59.272  INFO 13544 --- [tSqlDemo.main()] net.javabeat.SpringbootSqlDemo           : 5, FName, LName, Place, 20
2015-08-21 06:18:59.272  INFO 13544 --- [tSqlDemo.main()] net.javabeat.SpringbootSqlDemo           : 6, FName, LName, Place, 20
2015-08-21 06:18:59.272  INFO 13544 --- [tSqlDemo.main()] net.javabeat.SpringbootSqlDemo           : 7, fName2, lName2, Bangalore, 24
2015-08-21 06:18:59.272  INFO 13544 --- [tSqlDemo.main()] net.javabeat.SpringbootSqlDemo           : 8, FName, LName, Place, 20
2015-08-21 06:18:59.272  INFO 13544 --- [tSqlDemo.main()] net.javabeat.SpringbootSqlDemo           : 9, fName2, lName2, Bangalore, 24
Using JPA reduces lot of boiler plate code. One can even create methods in the Repository class and annotate it with the SQL we want to run. The code used in this article is available in the JavaBeat’s github repository here. (Also originally written in Sanaulla’s repository here).
In this article we saw how we moved from in-memory database to installed databases and also saw how we could use JdbcTemplate and JPA to interact with the db. We didn’t have to write any sort of XML configuration and everything was managed by auto configuration provided by Springboot. Overall, you would have got good idea on how to use SQL Databases and Spring Boot together for persisting the application data.
How are you doing in your projects, please share your experience in our comments section.
 Jasper Reports : org.codehaus.groovy.control.CompilationFailedException