
In our previous tutorials I have explained about Spring Data REST + GemFire + jQuery Integration and backbone.js integration. REST (Representational State Transfer) is one of the most effective ways Spring Data REST provides for consuming services. Client can be client side frameworks like AngularJS, jQuery, Backbone and Rest libraries. In this tutorial, you’re going to see the how to use Rest.js framework for accessing the GemFire REST services.
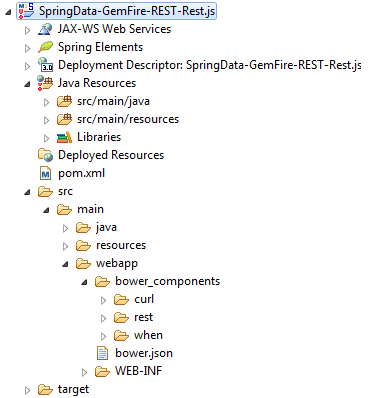
1. Project Structure

2. Tools Used
- JDK 1.6.
- Apache Tomcat 7.
- GemFire 7.0.1 Platform (JAR distribution)
- Maven 3.
- Rest.js
- Eclipse IDE
- Spring Data
- Spring Framework
3. Business Domain
We have a Message entity or object that needs to be used for the Restful service. This is the primary entity class for this tutorial.
Message.java
package net.javabeat.springdata.data;

import org.springframework.data.annotation.Id;
import org.springframework.data.annotation.PersistenceConstructor;
import org.springframework.data.gemfire.mapping.Region;

@Region("messages")
public class Message {
	@Id
	private String messageId;
	private String message;

	public Message() {
	}

	@PersistenceConstructor
	public Message(String id, String message) {
		this.messageId = id;
		this.message = message;
	}

	public String getMessageId() {
		return messageId;
	}

	public void setMessageId(String messageId) {
		this.messageId = messageId;
	}

	public String getMessage() {
		return message;
	}

	public void setMessage(String message) {
		this.message = message;
	}
}
4. Spring Data Repository
Repository provides you an abstraction layer in which you have never been providing an implementation for your CRUD operations even if it was a small portion of code. What you should have to do is to create your own interface that extends the Spring Data’s special Repository and the remaining work has been left for the Spring framework to complete the required implementation. So, you should have to provide a repository like below. If you look at the below class MessageRepository, it extends the CrudeRepository which is the spring data’s interface which defines the methods for the CRUD operations.
MessageRepository.java
package net.javabeat.springdata.repo;

import net.javabeat.springdata.data.Message;

import org.springframework.data.repository.CrudRepository;
import org.springframework.data.rest.core.annotation.RepositoryRestResource;

@RepositoryRestResource(collectionResourceRel="messages",path="messages")
public interface MessageRepository extends CrudRepository<Message,Integer> {}
As you’ve noted, the message repository is just an interface which is consider as an extension for the special spring data repository. You’ve mentioned the repository act on type i.e. Message business object in which the repository would play around of it to achieve the needed CRUD operations.
5. GemFire Spring Bean
It’s just an normal spring bean that used for providing a dummy messages that would be consumed by the services.
GemFireBean.java
package net.javabeat.springdata.bean;

import net.javabeat.springdata.data.Message;
import net.javabeat.springdata.repo.MessageRepository;

import org.springframework.beans.factory.annotation.Autowired;
import org.springframework.stereotype.Component;

@Component
public class GemFireBean {

	MessageRepository messageRepository;

	public GemFireBean(){

	}

	public MessageRepository getMessageRepository() {
		return messageRepository;
	}

	@Autowired
	public void setMessageRepository(MessageRepository messageRepository) {
		// Message repository has been set
		this.messageRepository = messageRepository;

		// Add some messages into GemFire for being seen
		Message message = new Message();
		message.setMessageId("1");
		message.setMessage("Hello JavaBeat !");

		messageRepository.save(message);

		// Add
		message = new Message();
		message.setMessageId("2");
		message.setMessage("Hello GemFire REST");
		messageRepository.save(message);
		System.out.println("Messages are filled");
	}
}
6. Spring Bean Definition
This is the simple XML configuration for the spring beans.
SpringContext.xml
<?xml version="1.0" encoding="UTF-8"?>
<beans xmlns="http://www.springframework.org/schema/beans"
	xmlns:xsi="http://www.w3.org/2001/XMLSchema-instance" xmlns:context="http://www.springframework.org/schema/context"
	xmlns:gfe-data="http://www.springframework.org/schema/data/gemfire"
	xmlns:gfe="http://www.springframework.org/schema/gemfire"
	xmlns:mvc="http://www.springframework.org/schema/mvc"
	xsi:schemaLocation="http://www.springframework.org/schema/mvc http://www.springframework.org/schema/mvc/spring-mvc-3.1.xsd http://www.springframework.org/schema/context http://www.springframework.org/schema/context/spring-context-3.0.xsd http://www.springframework.org/schema/beans http://www.springframework.org/schema/beans/spring-beans-3.0.xsd http://www.springframework.org/schema/data/gemfire http://www.springframework.org/schema/data/gemfire/spring-data-gemfire.xsd http://www.springframework.org/schema/gemfire http://www.springframework.org/schema/gemfire/spring-gemfire.xsd">
	<!-- Search for spring components -->
	<context:component-scan base-package="net.javabeat"></context:component-scan>
	<!-- Declare GemFire Cache -->
	<gfe:cache/>
	<!-- Local region for being used by the Message -->
	<gfe:local-region id="messages" value-constraint="net.javabeat.springdata.data.Message"/>
	<!-- Search for GemFire repositories -->
	<gfe-data:repositories base-package="net.javabeat.springdata.repo"/>
</beans>
7. Repository Rest Dispatcher Servlet & Web deployment Descriptor
To install spring data rest alongside your existing web application, you need to include the appropriate configuration.
- Spring Data REST configuration is defined in a class called RepositoryRestMvcConfiguration.
- Since Spring Data REST is simply a spring MVC application, you only need to include the RepositoryRestDispatcherServlet to use the REST functionality when we use spring framework with XML configurations.
The web deployment descriptor seems like below.
web.xml
<?xml version="1.0" encoding="UTF-8"?>
<web-app xmlns:xsi="http://www.w3.org/2001/XMLSchema-instance"
	xmlns="http://java.sun.com/xml/ns/javaee" xmlns:web="http://java.sun.com/xml/ns/javaee"
	xsi:schemaLocation="http://java.sun.com/xml/ns/javaee http://java.sun.com/xml/ns/javaee/web-app_2_5.xsd"
	id="WebApp_ID" metadata-complete="true" version="3.0">
	<context-param>
		<param-name>contextConfigLocation</param-name>
		<param-value>/WEB-INF/spring-config/SpringContext.xml</param-value>
	</context-param>
	<servlet>
		<servlet-name>rest</servlet-name>
		<servlet-class>org.springframework.data.rest.webmvc.RepositoryRestDispatcherServlet</servlet-class>
	</servlet>
	<servlet-mapping>
		<servlet-name>rest</servlet-name>
		<url-pattern>/rest/*</url-pattern>
	</servlet-mapping>
	<listener>
		<listener-class>org.springframework.web.context.ContextLoaderListener</listener-class>
	</listener>
</web-app>
8. Access GemFire Repositories
It’s just a steps for exposing the GemFire repositories through using of google Dev HTTP. For doing that just follow the below steps:
- Download the SoapUI for consuming a REST service.
- Type your host followed by the port number followed with the web context for the deployed application which should results in the token http://localhost:8080/SpringData-GemFire-REST-1.0.
- For consuming the messages resources, you have to add the RepositoryRestDispactherServlet mapping url which mentioned in the web.xml and it’s /rest/ which results in url value like http://localhost:8080/SpringData-GemFire-REST-Rest.js-1.0/rest/
- Add the The path segment under which this resource is to be exported. that value was provided using the path property at the header of the MessageRepository in order to be able of exposing the messages resource like below.

As you’ve noted the messages resources prefixed with the rest word that mapped to the RepositoryRestDispatcherServlet.
9. Setup Environment – Create Bower Configuration Files
First, create a bower (bower is a package manager) control which tells the bower where to put the JavaScript dependencies and for doing that you have to follow the below steps.
- Download Git (is a free and open source distributed version control system DVCS) and install it into your machine. In case you have used a linux or other operating systems, try to install the desired version by visiting the Git site.
- Download the node.js platform ( is a software platform offers a safe way to build high performance and scalable network applications in JavaScript).
- After finish the installation of Git & node.js, next it will be using the command line, so open the command line and navigate through it into webapps within your own project. In our case the location is D:\Krishna\EclipseLink\Workspace\SpringData-GemFire-REST-Rest.js-1.0\src\main\webapp.
- Type node -v to ensure that you are getting installed node.js successfully. You should find the version of the installed node.js platform. In our case the version is v0.10.28.
- Type npm -v to ensure that the npm (Node Package Manager) is installed properly. Node package manager used for managing the JavaScript dependencies, in which a JavaScript libraries have been installed, and a JavaScript programs have been published. In our case we’ve got 1.4.9 version.
- Type bower init for creating a bower.json file that describes each JavaScript package required by the project. Bower will ask for several bits of information such as project name, license, etc. If in doubt, just press Enter to accept the default.
- Next, use bower to install Backbone (since we’re using JavaScript modules, we’ll use the AMD version of Backbone), and an loader such as curl.js.

Where the resulted file should be bower.json that carrying the required information about JavaScript dependencies. And the project structure should be like.

From the command line type:
- bower install –save rest#~1
- bower install –save curl#~0.8
Bower will install these packages into directory.

Where, the structure of the project looks like
And the bower.json file should look like
bower.json
{
  "name": "SpringData-GemFire-REST-Rest.js",
  "version": "0.0.1",
  "description": "Spring Data REST - GemFire - Rest.js Integration",
  "main": "applicationModule",
  "authors": [
    "JavaBeat"
  ],
  "license": "MIT",
  "ignore": [
    "**/.*",
    "node_modules",
    "bower_components",
    "test",
    "tests"
  ],
  "dependencies": {
    "rest": "~1",
    "curl": "~0.8"
  }
}
Now, you’re ready for getting started writing a Rest.js components.
10. Rest.js Render Module
First, create a render function to inject data into an HTML document.
render.js
define(function (require) {

    var ready = require('curl/domReady');

    return render;

    function render (entity) {
        ready(function () {
            var idElement, nameElement;
            placeHolder = document.querySelector('[data-name="placeHolder"]');
			var messages = entity._embedded.messages;
			for(var i = 0 ; i < messages.length;i++){
				var index = i + 1;
				placeHolder.innerHTML += "Message # "+index+" :: " + messages[i].message + " :: <a href='"+messages[i]._links.self.href+"'>Message Link</a><br>";
			}
        });
    }
});
This AMD module uses simple DOM querying and manipulation to inject text into the document. To ensure that the DOM is not used before it is ready, the render module imports and uses curl.js’s domReady function-module.
11. Develop Rest.js Composition Application Module
Next, create a module that will compose the application. Note that the composition application module has been named as the bower init main file called.
applicationModule.js
define(function (require) {
    var rest = require('rest');
    var mime = require('rest/interceptor/mime');
    var entity = require('rest/interceptor/entity');
    var render = require('./render');
    var endpointUrl, client;
    endpointUrl = 'http://localhost:8080/SpringData-GemFire-REST-Rest.js-1.0/rest/messages';
    client = rest.chain(mime, { mime: 'application/json' }).chain(entity);
    client({ path: endpointUrl}).then(render);
});
The main module reads the query string from the document’s location object, configures a rest.js mime client, and calls the REST endpoint.
rest.js returns a Promises/A+ promise, which will call the render function-module when the endpoint returns data. The render function expects the entity, but the rest.js client normally returns a response object. The “rest/interceptor/entity” interceptor plucks the entity from the response and forwards that onto the render function.
12. Rest.js Boot Script
Next, create the boot script, boot.js:
var curl;
(function () {

    curl.config({
        main: 'applicationModule',
        packages: {
            // Third-party packages
            curl: { location: 'bower_components/curl/src/curl' },
            rest: { location: 'bower_components/rest', main: 'rest' },
            when: { location: 'bower_components/when', main: 'when' }
        }
    });

}());
This script configures the AMD loader: curl.config(). The main configuration property tells curl.js where to find the application’s main module, which will be fetched and evaluated automatically. The packages config object tells curl.js where to find modules in our application’s packages or in third-party packages.
13. Example Application (index.html)
Finally, create an index.html file and add the following HTML:
index.html
<!doctype html>
<html>
    <head>
		<title>JavaBeat Tutorials</title>
        <script data-curl-run="boot.js" src="bower_components/curl/src/curl.js"></script>
    </head>
    <body>
        <div>
			<h2>JavaBeat Tutorial !</h2>
			<h3>Spring Data REST - GemFire - Rest.js Demo</h3>
            <p data-name="placeHolder">

			</p>
        </div>
    </body>
</html>
The script element loads curl.js and then loads an application boot script named boot.js. The boot script initializes and configures an AMD module environment and then starts the client-side application code.
14. Spring Data REST & Rest.js Demo
By invoking the index.html through typing the http://localhost:8080/SpringData-GemFire-REST-Rest.js-1.0/index.html into address section within the browser, you will be getting the below result.

15. Summary
You’ve just developed an application that exposes a Spring Data Rest + GemFire repository to be accessed through the HTTP and a Rest.js JavaScript framework. If you have any questions, please write it in the comments section.