
In order to develop a mobile application which has many windows we need to create an activity for each window which extends activity class. When you create a simple helloworld application the first activity will be automatically created. You might be thinking how to add a new activity to your already developed helloworld application.
In This tutorial we will be discussing about how to add a new activity to your helloWorld application.
An activity can be created in two ways
- Through AndroidManifest.xml
- It can be created programmatically
Creating a new Activity using AndroidManifest.xml
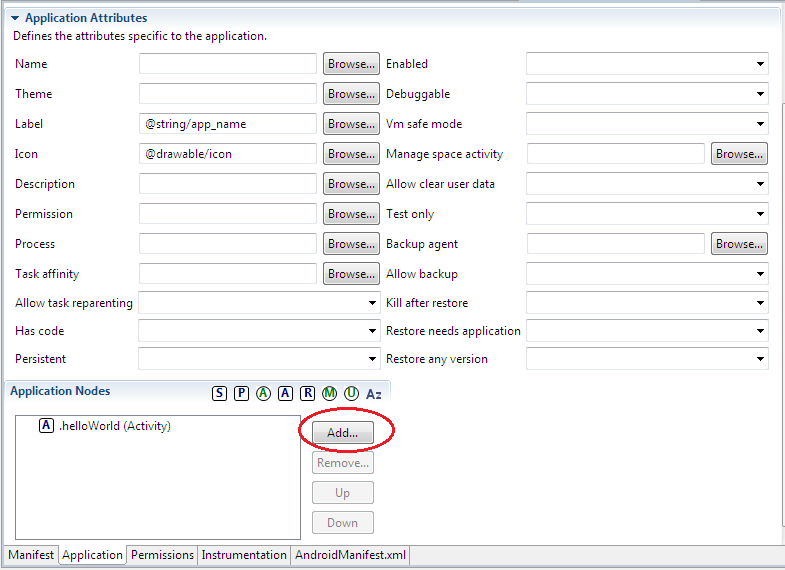
When you open your manifest file you can find the below section at the bottom of the manifest window in Eclipse IDE.
![]()
Click on the highlighted “Application” to add a new Activity. It takes you to the below screen.
Click the highlighted “Add” button. That takes you to the below screen.
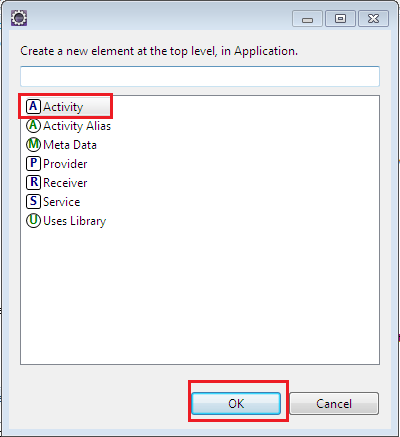
Select the highlighted “Activity” and click “OK” button. After clicking OK a new “Activity” node appears in the previously opened manifest window as below.
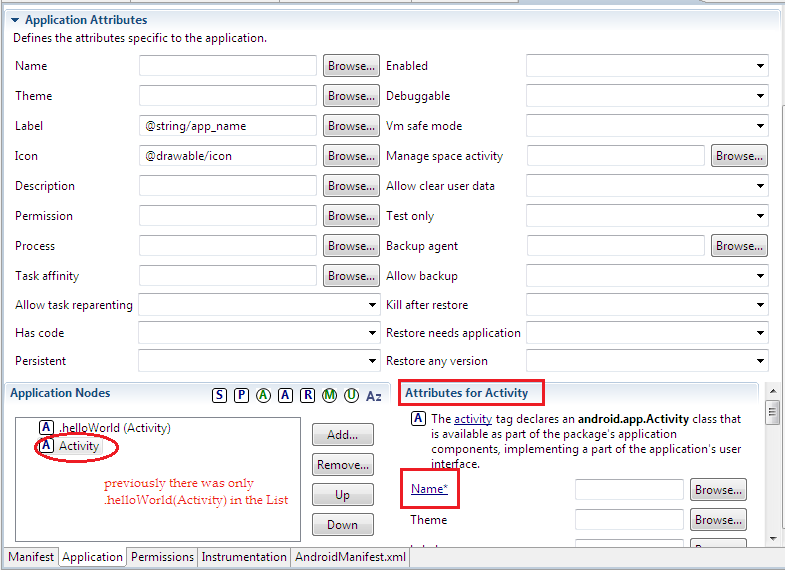
As you can notice a new “Activity” node has got added and also a new pane got appeared to the right of the “Application Nodes” pane. The name of the new pane is “Attributes for Activity”. Click on the highlighted “Name” section as in the above screen. That takes you to below screen.
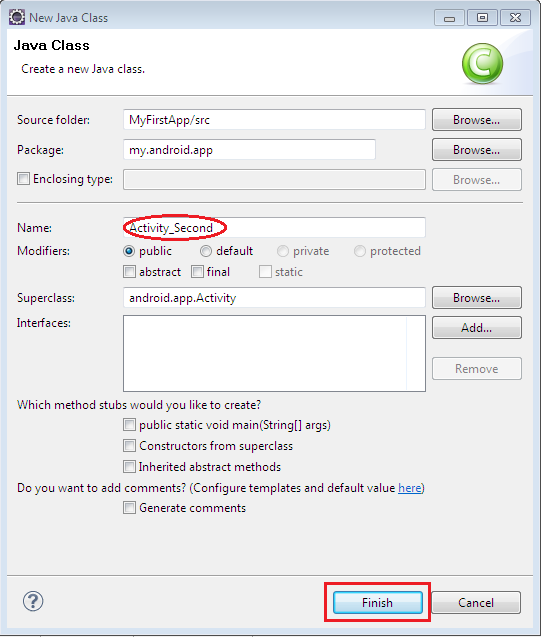
Give a name to your activity. I have named it as “Activity_Second” and click the “Finish” button.
Your second activity has been created now. The initial code of your second activity is as below.
package my.android.app;
import android.app.Activity;
import android.os.Bundle;
public class Activity_Second extends Activity {
/** Called when the activity is first created. */
@Override
public void onCreate(Bundle savedInstanceState) {
super.onCreate(savedInstanceState);
// TODO Auto-generated method stub
}
}
Creating a new Activity programmatically
You can create an Activity class like any other Java class.
- Open File->new->class
You will get the below screen.
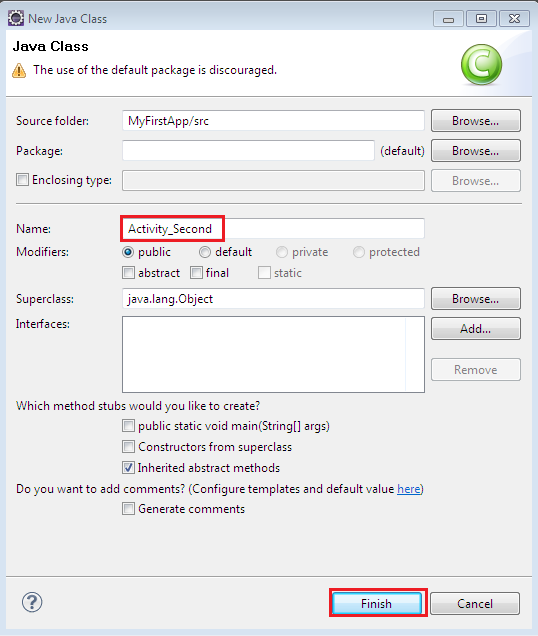
Lets name the Activity as “Activity Second” and give the package name as “my.android”. Click “Finish” button.
The new activity is now created and the initial code is as below.
package my.android;

public class Activity_Second {

}
You can notice the difference between the code that got created when we create a new activity using AndroidManifest.xml and when it got created Programmatically. The Eclipse ADT doesn’t help you much when you create an Activity in this manner. You have to Edit it from the source. Hope you have understood how to create a new Activity. We shall discuss how to navigate from one activity to another in my next post. If you have any questions on creating the activity, please write it on the comments section.