You’ve already seen how to lay out user interface elements with templates. In addition, facelets allows you to define a custom tags. A custom tag looks like a regular JSF tag, but it uses the facelets composition mechanism to insert content into your page.
Implementing a custom Facelets tags with jsf2.0 is a two step:
- Implement the custom tag (or component) in an XHTML file.
- Declare the custom tag in a tag library descriptor.
Implementing custom facelets tags with jsf2.0 is a simple matter, and it is highly recommended for factoring out repetitive markup. Even that custom facelets tags aren’t as powerful as a full-fledged JSF components (It will be discussed later). In particular, you cannot attach functionality, such as validators or listeners, to facelets custom tag. As an example we cannot add an action listener to the javabeat:tutorial tag. Jsf2.0 addresses this concern with a more advanced component mechanism, called composite components. Composite components will be discussed in a separate post.
Also Read:
1. The Custom Tag
tutorial.xhtml
<html xmlns="http://www.w3.org/1999/xhtml"
	xmlns:ui="http://java.sun.com/jsf/facelets"
	xmlns:h="http://java.sun.com/jsf/html"
	xmlns:f="http://java.sun.com/jsf/core">
<ui:composition>
	<h:outputLink value="#{tutorialNavigator.navigate(tutorialId)}">
		<h:outputText value="#{desc}"/>
	</h:outputLink>
</ui:composition>
</html>
2. The Descriptor of Custom Tag
javabeat.jsf.taglib.xml
<?xml version="1.0" encoding="UTF-8"?>
<facelet-taglib>
<namespace>https://javabeat.net/facelets</namespace>
<tag>
 <tag-name>tutorial</tag-name>
 <source>tags/javabeat/tutorial.xhtml</source>
</tag>
</facelet-taglib>
3. The Deployment Descriptor (web.xml)
web.xml
<?xml version="1.0" encoding="UTF-8"?>
<web-app xmlns:xsi="http://www.w3.org/2001/XMLSchema-instance"
	xmlns="http://java.sun.com/xml/ns/javaee" xmlns:web="http://java.sun.com/xml/ns/javaee/web-app_2_5.xsd"
	xsi:schemaLocation="http://java.sun.com/xml/ns/javaee
	http://java.sun.com/xml/ns/javaee/web-app_2_5.xsd"
	id="WebApp_ID" version="2.5" metadata-complete="true">
	<context-param>
		<description>State saving method: 'client' or 'server'
						(=default). See JSF Specification 2.5.2
		</description>
		<param-name>javax.faces.STATE_SAVING_METHOD</param-name>
		<param-value>client</param-value>
	</context-param>
	<context-param>
		<param-name>javax.faces.application.CONFIG_FILES</param-name>
		<param-value>/WEB-INF/faces-config.xml</param-value>
	</context-param>
	<context-param>
		<param-name>facelets.LIBRARIES</param-name>
		<param-value>/WEB-INF/javabeat.jsf.taglib.xml</param-value>
	</context-param>
	<servlet>
		<servlet-name>Faces Servlet</servlet-name>
		<servlet-class>javax.faces.webapp.FacesServlet</servlet-class>
		<load-on-startup>1</load-on-startup>
	</servlet>
	<servlet-mapping>
		<servlet-name>Faces Servlet</servlet-name>
		<url-pattern>/faces/*</url-pattern>
	</servlet-mapping>
	<servlet-mapping>
		<servlet-name>Faces Servlet</servlet-name>
		<url-pattern>*.xhtml</url-pattern>
	</servlet-mapping>
	<listener>
		<listener-class>com.sun.faces.config.ConfigureListener</listener-class>
	</listener>
</web-app>
- Pay attention for the using of a new context parameter for enabling the use of the new developed custom tags, facelets.LIBRARIES context parameter used for such that major enabling.
4. The Views
JPATutorial.xhtml
<!DOCTYPE html PUBLIC "-//W3C//DTD XHTML 1.0 Transitional//EN"
    "http://www.w3.org/TR/xhtml1/DTD/xhtml1-transitional.dtd">

<html xmlns="http://www.w3.org/1999/xhtml"
	xmlns:ui="http://java.sun.com/jsf/facelets"
	xmlns:h="http://java.sun.com/jsf/html"
	xmlns:f="http://java.sun.com/jsf/core">
	<h1>JavaBeat JSF 2.2 Examples</h1>
	<h2>JSF2 Custom Tags Example</h2>
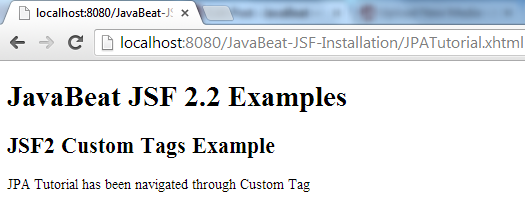
	JPA Tutorial has been navigated through Custom Tag
</html>
JSFTutorial.xhtml
<html xmlns="http://www.w3.org/1999/xhtml"
	xmlns:ui="http://java.sun.com/jsf/facelets"
	xmlns:h="http://java.sun.com/jsf/html"
	xmlns:f="http://java.sun.com/jsf/core">
	<h1>JavaBeat JSF 2.2 Examples</h1>
	<h2>JSF2 Custom Tags Example</h2>
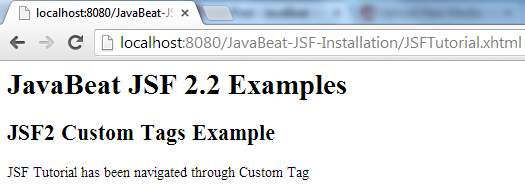
	JSF Tutorial has been navigated through Custom Tag
</html>
index.html
<html xmlns="http://www.w3.org/1999/xhtml"
	xmlns:ui="http://java.sun.com/jsf/facelets"
	xmlns:h="http://java.sun.com/jsf/html"
	xmlns:f="http://java.sun.com/jsf/core"
	xmlns:c="http://java.sun.com/jsp/jstl/core"
	xmlns:javabeat="https://javabeat.net/facelets">
<h:head>
	<title><h:outputText value="JavaBeat UI Param Example" /></title>
</h:head>
<h:body>
	<h1>JavaBeat JSF 2.2 Examples</h1>
	<h2>JSF2 Custom Tags Example</h2>
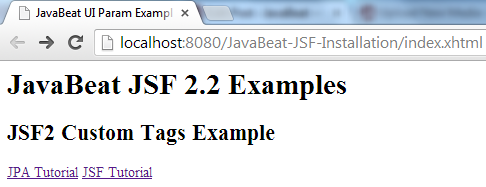
	<javabeat:tutorial tutorialId="jpa" desc="JPA Tutorial"/>
	#{' '}
	<javabeat:tutorial tutorialId="jsf" desc="JSF Tutorial"/>
</h:body>
</html>
5. Managed Bean
The using of custom component doesn’t require using of managed beans, although the limitations of using custom tags is exist, but it doesn’t mean that the managed beans couldn’t be used.
TutorialNavigator.java
package net.javabeat.corejsf;

import java.util.HashMap;
import java.util.Map;

import javax.faces.bean.ManagedBean;
import javax.faces.bean.RequestScoped;

@ManagedBean
@RequestScoped
public class TutorialNavigator {
	public static final Map<String,String> pages = new HashMap<String,String>();

	public TutorialNavigator() {
		pages.put("jpa", "JPATutorial.xhtml");
		pages.put("jsf", "JSFTutorial.xhtml");
	}
	public String navigate(String tutorial){
		return pages.get(tutorial) != null ? pages.get(tutorial) : "";
	}
}
6. JSF 2 Custom Tag Demo
The below snapshots will show you complete demonstration of using a custom tag for making a links that can help navigating between different tutorials.


One remaining note must be mentioned, in that the possibility of using a ui:component as an alternative way of making a custom Tag. Using of ui:component tag will make the child elements to be placed inside a jsf component view, so the created custom tag is applicable to use binding & rendered attributes in order the component can be associated into a bean property and it can be seen conditionally.
7. UI Component
tutorial.xhtml
<html xmlns="http://www.w3.org/1999/xhtml"
	xmlns:ui="http://java.sun.com/jsf/facelets"
	xmlns:h="http://java.sun.com/jsf/html"
	xmlns:f="http://java.sun.com/jsf/core">
<ui:component binding="#{tutorialNavigator.component}" rendered="#{tutorialNavigator.applicable}">
	<h:outputLink value="#{tutorialNavigator.navigate(tutorialId)}">
		<h:outputText value="#{desc}"/>
	</h:outputLink>
</ui:component>
</html>
[wpdm_file id=25]

 JSF 2 UI Param Example