
In my previous tutorial I have explained about how to create a web application using the Maven tool. This tutorial explains how to build your web application project using the Maven artifacts. What is artifacts?. Every framework developer have the repository to store their packages where maven would download from the given artifact id. This artifact id is internally linked to a URL which is the binary distribution of the package. Developers need not spending time on downloading all the dependencies, maven takes care of downloading for them.
You can get the artifacts details for the spring framework project here. In fact they are no more distributing the binary packages, they all recommending to use the Maven or Gradle to build the applications. In the next sections, I will write simple steps which will help you to build and package your first Spring MVC application using Maven. If you have any questions, please write it in the comments section.
I assume that you have already created the web project using Maven. If you have not done, please refer my previous article.
1. Add Spring Framework Dependencies In pom.xml
This should be the first step on configuring your Maven to work for Spring projects. Lets get the spring artifacts and configure it in the pom.xml. Also add the other required dependencies if any to the pom.xml. Add the below entry to pom.xml:
<dependency>
   <groupId>org.springframework</groupId>
   <artifactId>spring-context</artifactId>
   <version>${spring.version}</version>
</dependency>
In the above snippet, ${spring.version} is the exact version name which you want to package your project.
2. Add The Build Details
This is the most important part of the pom.xml to build your project.
<build>
<finalName>SpringMVCTestFramework</finalName>
   <plugins>
         <plugin>
             <groupId>org.apache.maven.plugins</groupId>
             <artifactId>maven-compiler-plugin</artifactId>
             <version>3.0</version>
             <configuration>
                <source>${jdk.version}</source>
                <target>${jdk.version}</target>
             </configuration>
         </plugin>
     </plugins>
 </build>
The complete pom.xml file would loom like this:
<project xmlns="http://maven.apache.org/POM/4.0.0"
xmlns:xsi="http://www.w3.org/2001/XMLSchema-instance"
xsi:schemaLocation="http://maven.apache.org/POM/4.0.0
http://maven.apache.org/maven-v4_0_0.xsd">
 <modelVersion>4.0.0</modelVersion>
 <groupId>javabeat.net</groupId>
 <artifactId>SpringMVCTestFramework</artifactId>
 <packaging>war</packaging>
 <version>1.0-SNAPSHOT</version>
 <name>SpringMVCTestFramework Maven Webapp</name>
 <url>http://maven.apache.org</url>
 <properties>
       <spring.version>3.2.4.RELEASE</spring.version>
       <junit.version>4.11</junit.version>
       <jdk.version>1.6</jdk.version>
 </properties>
 <dependencies>
    <dependency>
        <groupId>org.springframework</groupId>
        <artifactId>spring-context</artifactId>
        <version>${spring.version}</version>
    </dependency>
 <dependency>
 <groupId>junit</groupId>
 <artifactId>junit</artifactId>
 <version>${junit.version}</version>
 <scope>test</scope>
 </dependency>
 </dependencies>
 <build>
     <finalName>SpringMVCTestFramework</finalName>
        <plugins>
           <plugin>
              <groupId>org.apache.maven.plugins</groupId>
              <artifactId>maven-compiler-plugin</artifactId>
              <version>3.0</version>
              <configuration>
              <source>${jdk.version}</source>
              <target>${jdk.version}</target>
             </configuration>
          </plugin>
        </plugins>
     </build>
</project>
3. Create The Spring MVC Files
The above steps completed the Maven configuration for your project. Now its time to create the Spring MVC files for your project. Here we will create a simple controller and jsp file to run the application.
 package javabeat.net;

import org.springframework.stereotype.Controller;
import org.springframework.ui.ModelMap;
import org.springframework.web.bind.annotation.RequestMapping;
import org.springframework.web.bind.annotation.RequestMethod;

@Controller
@RequestMapping("/")
public class HelloController {
    @RequestMapping(value="/hello", method = RequestMethod.GET)
    public String welcome(ModelMap model) {
        //Your statements
        return "hello";
    }
  }
hello.jsp
<html>
   <body>
       <h2>Hello World!</h2>
   </body>
</html>
You can create your spring configurations files or add any more files. I am not diving deep into the Spring MVC specific things, this tutorial is one meant for how to configure on Spring MVC.
- Spring MVC Framework With Example
- Spring MVC Annotations
4. Package The Application
The above examples are only for the samples. Once all the required files are created, please run the following command in your project’s root directory.
$mvn package
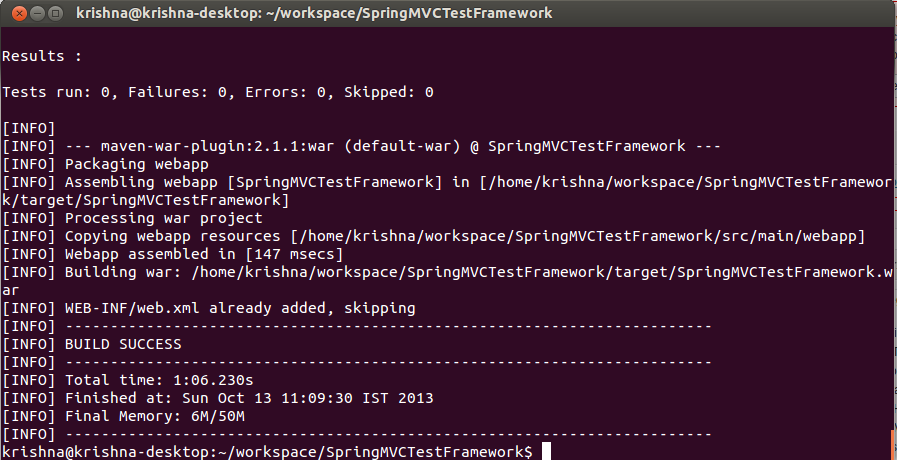
Once the application is packaged, generated war file will be created inside the folder target. The final structure would look like this:
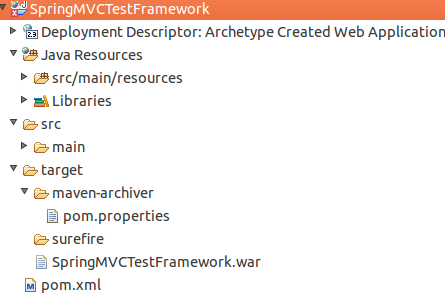
You can copy the ear file and deploy to your server. If you analyse the war file, it will have all the dependency files packaged inside for the deployment. I hope this tutorial would have helped you to understand the basic idea on how to build and package the web application in Maven. If you are using the ANT for you build, start exploring with advanced management tools like Maven to simplify your development work. If you have any questions, please write it in the comments section.
 Create Web Application Project With Maven