In my previous post I wrote about using decoders with WebSocket. In the same post I mentioned about Encoders and that they are used for encoding the Java objects or any data into some string/binary format which is then sent to the client end point of the websocket connection. In this post I will elaborate and explain the use of Encoders with an example. The example which I have chosen for this post is implementing an Echo Server. An Echo Server echoes back the messages sent to it to all the clients connected to it. In addition to this I will be making use of a CSS framework called Bootstrap which has been open sourced by Twitter. Bootstrap helps in creating better looking web interfaces as it provides a complete CSS solution for all the elements which can be added to a web page.
I am going to divide this post into 3 parts namely:
- Creating the encoder
- Creating the Server end point of the WebSocket
- Creating the Client end point of the WebSocket
Creating The Encoder
The task of encoder is to convert the application specific data into a format which can be transported to the client end point. To create a encoder we would have to be aware of few interfaces, just like that way we had to while creating the decoder.
| Encoder | The Encoder interface defines how developers can provide a way to convert their custom objects into web socket messages. The Encoder interface contains subinterfaces that allow encoding algorithms to encode custom objects to: text, binary data, character stream and write to an output stream. |
| Encoder.Binary<T> | This interface defines how to provide a way to convert a custom object into a binary message. |
| Encoder.BinaryStream<T> | This interface may be implemented by encoding algorithms that want to write the encoded object to a binary stream. |
| Encoder.Text<T> | This interface defines how to provide a way to convert a custom object into a text message. |
| Encoder.TextStream<T> | This interface may be implemented by encoding algorithms that want to write the encoded object to a character stream. |
In this post we will make use of the Encoder.Text<T> interface. Let us also look at our model class which stores the message received from the client along with the time at which the message was received:
import java.util.Date;
public class MyMessage {

  public MyMessage() {
  }

  public MyMessage(String message, Date receivedAt) {
    this.message = message;
    this.receivedAt = receivedAt;
  }

  public String message;
  public Date receivedAt;
}
The class definition for our encoder is:
import java.io.StringWriter;
import javax.json.Json;
import javax.websocket.EncodeException;
import javax.websocket.Encoder;
import javax.websocket.EndpointConfig;

/**
 * Encoder which encodes the object data into messages
 * which can be transported over the websocket connection.
 */
public class EchoServerEncoder implements Encoder.Text<MyMessage> {

  /**
   * Encode the instance of MyMessage into a JSON string.
   */
  @Override
  public String encode(MyMessage myMsg) throws EncodeException {

    StringWriter writer = new StringWriter();
    //Makes use of the JSON Streaming API to build the JSON string.
    Json.createGenerator(writer)
            .writeStartObject()
              .write("message", myMsg.message)
              .write("time", myMsg.receivedAt.toString())
            .writeEnd()
            .flush();
    System.out.println(writer.toString());
    return writer.toString();
  }

  @Override
  public void init(EndpointConfig config) {
  }

  @Override
  public void destroy() {
  }
}
In the above code the encode() method accepts an instance of MyMessage and then constructs the JSON string data from the data present in that instance. To create the JSON data I am using the Streaming API. Read- creating json data to familiarize yourself with the JSON construction code. Now that we have constructed the encoder, we proceed next to create the server websocket and then register the encoder class.
Creating The Server End Point Of The WebSocket
The code for server websocket is:
import java.util.Date;
import javax.websocket.OnClose;
import javax.websocket.OnMessage;
import javax.websocket.OnOpen;
import javax.websocket.Session;
import javax.websocket.server.ServerEndpoint;

@ServerEndpoint(value="/send",
        encoders = {EchoServerEncoder.class})
public class EchoServerSocket {

  @OnOpen
  public void open(){
    System.out.println("Opening the websocket");
  }

  @OnMessage
  public void receiveMessage(String msg, Session session) throws Exception{

    System.out.println("Recieved at server: "+msg);

    //construct the object containing the message and timestamp.
    MyMessage myMsg = new MyMessage(msg, new Date());
    //Send the message and timestamp data to all the clients connected
    //to this server socket.
    for(Session aSession : session.getOpenSessions()){
      aSession.getBasicRemote().sendObject(myMsg);
    }
  }

  @OnClose
  public void close(Session session){
    System.out.println("Closing the websocket");
  }
}
If you are unable to understand the above code, please read the basic post about creating websocket.
Creating The Client End Point Of The WebSocket
As I mentioned at the beginning of the post that I would be using the Bootstrap CSS framework. One can download it from http://getbootstrap.com/ and the docs can also be accessed from the same place. Lets look at the JSP code which renders the UI for this sample:
<!-- Filename: index.jsp -->
<!DOCTYPE html>
<html>
  <head>
    <title>Echo Server Demo</title>
    <link href="bootstrap/css/bootstrap.css" rel="stylesheet"/>
    <link href="bootstrap/css/bootstrap-responsive.min.css" rel="stylesheet"/>
    <script src="bootstrap/js/bootstrap.min.js" type="text/javascript"></script>
    <script src="bootstrap/js/echoserver.js" type="text/javascript"></script>
    <meta http-equiv="Content-Type" content="text/html; charset=UTF-8">
  </head>
  <body>
    <header id="overview">
      <div class="container">
        <h1>Echo Server Demo</h1>
      </div>
    </header>
    <div class="container">
      <div class="row">
        <div class="span5">

            <div class="control-group">
              <div class="controls">

                <input type="text" id="chatMsg" required/>

                <span class="help-inline" id="chatMsgInfo"></span>
              </div>
            </div>
            <div class="control-group">
              <div class="controls">
                <button  id="sendMsg" class="btn">Send to Server</button>
              </div>
            </div>

        </div>
      </div>

      <div class="row">
        <div class="span10">
          <h3>Sent from server</h3>
          <dl class="dl-horizontal" id="serverMsg">

          </dl>
        </div>
      </div>

    </div>
  </body>
</html>
The custom javascript code which creates the client websocket connection is:
//Filename: echoserver.js
window.onload = init;

var websocket;
function init() {
  initWebSocket();

  var sendButton = document.getElementById("sendMsg");
  sendButton.onclick = sendToServer;
}

function sendToServer() {
  var chatMsgText = document.getElementById("chatMsg");
  var chatMsg = chatMsgText.value;
  if (chatMsg) {

    websocket.send(chatMsg);
    document.getElementById("chatMsgInfo").innerHTML = " ";
  }
  else {
    document.getElementById("chatMsgInfo").innerHTML = "Enter some message to be sent";

  }
}

/**
 * Function to init the WebSocket connection to the server endpoint
 */
function initWebSocket() {
  //If the websocket is not intialized, then create a new one.
  if (websocket == null) {
    websocket = new WebSocket("ws://localhost:8080/EchoServer/send");
  }
  else if (websocket != null) {
    //The websocket might have been closed, so reconnect to the server.
    if (websocket.readyState != WebSocket.OPEN) {
      websocket = new WebSocket("ws://localhost:8080/EchoServer/send");
    }
  }

  websocket.onmessage = function(event) {
    var serverMsgs = document.getElementById("serverMsg");
    console.log(event.data);
    var msgObj = JSON.parse(event.data);
    var dt = document.createElement("dt");
    dt.innerHTML = msgObj.time;
    serverMsgs.appendChild(dt);
    var dd = document.createElement("dd");
    dd.innerHTML = msgObj.message;
    serverMsgs.appendChild(dd);
  }
}
With this we are done with building the Echo Server sample. If you want to try out the sample developed, download the project here : [download id=”19″] and load it into Netbeans 7.3.1 with JavaEE 7 and Glassfish 4. And then deploy the project onto server.
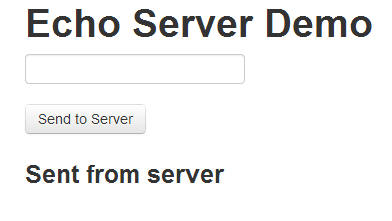
Launching the application will give you the following screen:

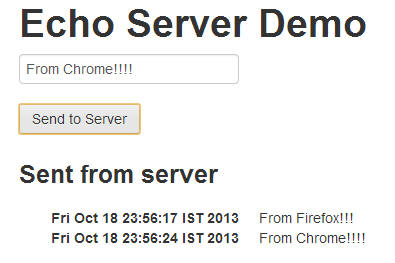
And exchanging few messages with the server results in:


 Create CSS Classes For Buttons