• Menu
  • Skip to primary navigation
  • Skip to main content
  • Skip to primary sidebar

JavaBeat

Java Tutorial Blog

  • Java
    • Java 7
    • Java 8
    • Java EE
    • Servlets
  • Spring Framework
    • Spring Tutorials
    • Spring 4 Tutorials
    • Spring Boot
  • JSF Tutorials
  • Most Popular
    • Binary Search Tree Traversal
    • Spring Batch Tutorial
    • AngularJS + Spring MVC
    • Spring Data JPA Tutorial
    • Packaging and Deploying Node.js
  • About Us

Eclipse Tips : How To Add Server In Eclipse

April 16, 2014 //  by Krishna Srinivasan

This example illustrates how to add the server instance using the server wizard in Eclipse. One of the greatest advantage of using the IDE’s like Eclipse is that developers can use the server instances inside the editor itself without leaving the Eclipse environment. Eclipse itself supports the multiple server adapters to easily integrate the server by just location the server installation directory. Here I have added the screenshots to add server for more clarity.

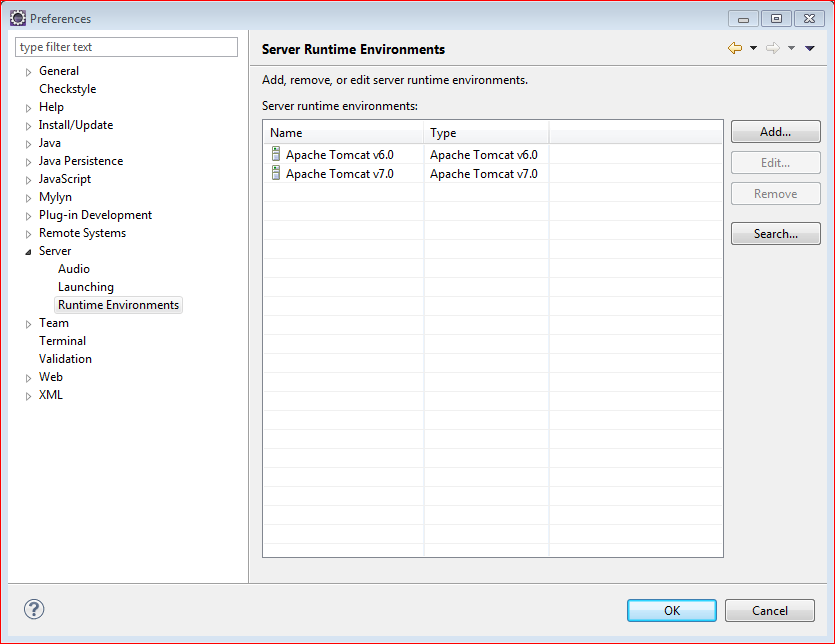
1. List Server Runtime Environments

Navigate to Windows -> Preferences -> Server -> Runtime Environments  to open the window for listing the configured runtime environments. You can configure the as many as servers within your eclipse instance. Click on the “Add” button to add new server instance.

Eclipse Add Server

2. Select Server Type

Once you have clicked the “Add”, you will be presented with the list of server types supported by the Eclipse. If it is not listed, try to download by clicking the link “Download additional server adapters”.

Eclipse New Server

3. Select Server Location

This is the last step to configure the server. Here click on the “Browse” button and select the home directory of the server type you have selected in the previous step. If the selected folder is not valid server configuration, you will see an error. Clicking on the “Finish” button will add the server to the server panel. Server is ready for the use.

Server Instance Runtime

Category: EclipseTag: Eclipse Tips

About Krishna Srinivasan

He is Founder and Chief Editor of JavaBeat. He has more than 8+ years of experience on developing Web applications. He writes about Spring, DOJO, JSF, Hibernate and many other emerging technologies in this blog.

Previous Post: « Enabling / Disabling Form Elements using JavaScript
Next Post: Eclipse Tips : How To Create Custom Code Template In Eclipse »

Primary Sidebar

Follow Us

  • Facebook
  • Pinterest

FEATURED TUTORIALS

How to Initialize an Array in Java

Introduction to Java Server Faces (JSF)

Introduction to Java 6.0 New Features, Part–1

Java 6.0 Features Part – 2 : Pluggable Annotation Processing API

Introduction to Java Server Faces(JSF) HTML Tags

JavaBeat

Copyright © by JavaBeat · All rights reserved
Privacy Policy | Contact