HTML has a separate element for image display. This will display the image in a specific region of the page. If we want to add multiple pictures and view it one at a time, then HTML does not have any such tag. We need to build our own design for that. This is a JavaScript code which will facilitate a new design to display images in a web page.
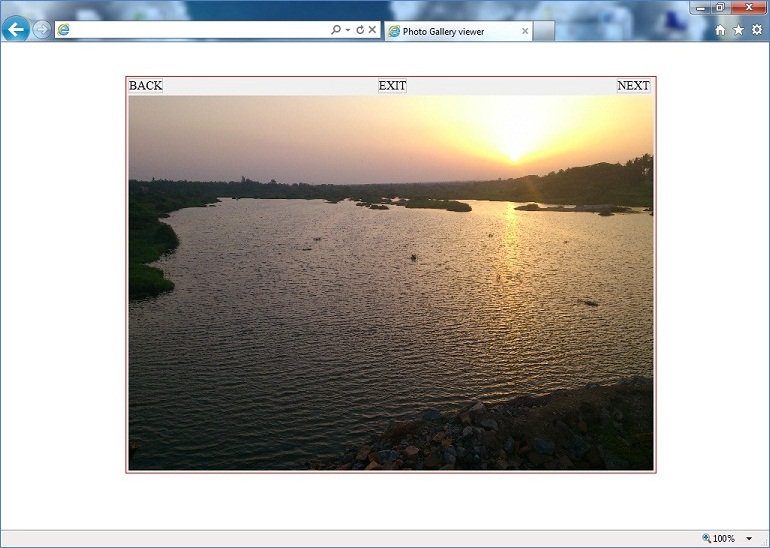
We have navigation buttons namely back and next to view the various pictures and an exit button to exit this window and view the page.Let us first see how we need to use this java script functionality in the web browser.
<div id="imageViewer"></div>
<a href="#" onclick="showImage('Gallery/Mangalore',101)">Mangalore</a>
<br/>
<a href="#" onclick="showImage('Gallery/Sceneries',101)">Sceneries</a>
First step is that we need to create is a div element. This element must be named as imageViewer. Note that no other name shall be used here, as our script can identify only this name. To specify various links to be used, we can add anchor elements which would invoke the showImage script functions. Two parameters, namely the image folder path and the first image name must be passed. Note that the name of the image can be only numbers between 101 and 999. And the extension of the file must be JPG in caps. For example 104.JPG.
Once this is done, we are done for making our viewer. The photo viewer code looks as below.
<script type="text/javascript">
imageName=0;
folderName='empty';
arrows=true;

function showImage(folder,file) {
	imageName=file;
	folderName=folder;
	displayDivision();
	displayImage();
}

function changeImageNext() {
	imageName++;
	displayImage();
}

function changeImageBack() {
	imageName--;
	displayImage();
}

function displayDivision() {

	if(arrows) {
		arrows=false;

		//create a outer image division and set its style properties
		outerImageDiv = document.createElement('DIV');
		outerImageDiv.id='outerImageDiv';
		outerImageDiv.style.position='fixed';
		outerImageDiv.style.width='100%';
		outerImageDiv.style.height='100%';
		document.getElementById("imageViewer").appendChild(outerImageDiv);

		//create a table element and set its style properties
		table = document.createElement('table'); //table tab
		table.id='imageTable';
		table.align='center';
		table.frame='box';
		table.style.backgroundColor='#F0F0F0';

		//create a table body element
		tbody=document.createElement('tbody'); //tbody  tbo

		//create the first row of the table.
		firstRow=document.createElement('tr');  //row

		//create the first cell of first row and align it
		firstCellRow1=document.createElement('td');  // cell
		firstCellRow1.align='left';
		//populate the elements of the firstCellRow1
		backSpan = document.createElement("span");
		backSpan.id='backSpan';
		backSpan.style.border='1px solid #C8C8C8';
		backSpan.onclick=function() {changeImageBack();};
		backSpan.appendChild(document.createTextNode(' BACK '));
		firstCellRow1.appendChild(backSpan);
		firstRow.appendChild(firstCellRow1);

		//create the second cell of first row and align it
		secondCellRow1=document.createElement('td'); //cell
		secondCellRow1.align='center';
		//populate the elements of the secondCellRow1
		exitSpan = document.createElement("span");
		exitSpan.id='exitSpan';
		exitSpan.style.border='1px solid #C8C8C8';
		exitSpan.onclick=function() {removeDivision();};
		exitSpan.appendChild(document.createTextNode(' EXIT '));
		secondCellRow1.appendChild(exitSpan);
		firstRow.appendChild(secondCellRow1);

		//create the third cell of first row and align it
		thirdCellRow1=document.createElement('td');
		thirdCellRow1.align='right';
		//populate the elements of the thirdCellRow1
		nextSpan = document.createElement("span");
		nextSpan.id='nextSpan';
		nextSpan.style.border='1px solid #C8C8C8';
		nextSpan.onclick=function() {changeImageNext();};
		nextSpan.appendChild(document.createTextNode(' NEXT '));
		thirdCellRow1.appendChild(nextSpan);
		firstRow.appendChild(thirdCellRow1);

		//append the first row in the table body
		tbody.appendChild(firstRow);

		//create the second row of the table.
		secondRow=document.createElement('tr');

		//create the first cell of first row, align it and span
		firstCellRow2=document.createElement('td');
		firstCellRow2.align="center";
		firstCellRow2.colSpan='3';

		//populate the elements of the first cell in row 2

		//create and set style for the image division
		imageDiv = document.createElement('DIV');
		imageDiv.id='imageDiv';
		imageDiv.style.backgroundColor='#F0F0F0';
		imageDiv.style.width ='700px';
		imageDiv.style.height ='500px';

		//create and append an image element to the image division
		image = document.createElement("IMG");
		image.id='myImages';
		imageDiv.appendChild(image);

		firstCellRow2.appendChild(imageDiv);
		secondRow.appendChild(firstCellRow2);

		//append the second row in the table body
		tbody.appendChild(secondRow);

		//append the table body in the table
		table.appendChild(tbody);

		//append the table to the oter image division
		document.getElementById('outerImageDiv').appendChild(document.createElement('br'));
		document.getElementById('outerImageDiv').appendChild(document.createElement('br'));
		document.getElementById('outerImageDiv').appendChild(table);
	}

	document.getElementById('outerImageDiv').style.visibility='visible';
}

function displayImage() {
	//create a new image element and set the style for it
	newImage = document.createElement("IMG");
	newImage.src =folderName+"/"+imageName+".JPG";
	newImage.id='myImages';
	newImage.style.width = '700px';
	newImage.style.height ='500px';
	newImage.onerror=function() {noImagesToDisplay();};

	//replace the old image with the new image.
	oldImage = document.getElementById('myImages');
	document.getElementById('imageDiv').replaceChild(newImage, oldImage);
}

function removeDivision() {
	document.getElementById('outerImageDiv').style.visibility='hidden';
	alert('Thanks for viewing');
}

function noImagesToDisplay() {
	document.getElementById('outerImageDiv').style.visibility='hidden';
	alert('no images to display');
}
</script>
Some of the operations that this script supports are next navigation, which takes to the next picture in the folder. back navigation which takes to the previous photo in the folder. The exit will exit from the viewer into the html page. On exit an alert message specifying “thanks for viewing” shall be shown to the user. If there are no more pictures, then “no images to display” alert message shall be displayed to the user.
We are all set. Now try to open the web page in your browser and click on the links. You shall get an amazing new window open in which your image will be displayed. Moreover we also have some navigation features which make our photo viewing experience great.