
In Java, the set contains() method accepts the target element as a parameter and is used with a dot syntax: “setName.contains(Object targetElement);”.
Java

How to Get the Current Working Directory in Java
To get the current directory in Java, you can use the classes like “System”, “Paths”, “File”, “FileSystems” and “SystemUtils”.
How to Use a Swap() Method in Java?
The Collections.swap() method interchanges the two values at the given index within the List or collection of the object as shown in this article.
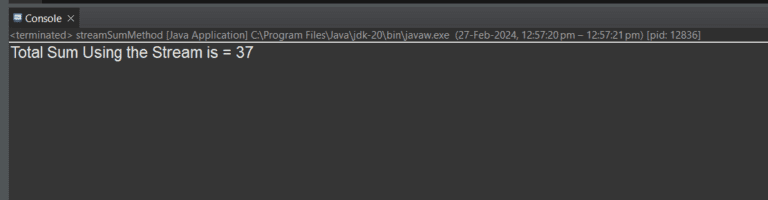
How to Sum the Numbers with Java Streams?
To sum the numbers using the Java Streams, use different methods such as MapToInt(), reduce(), collect(), and IntStream() as shown in this article.
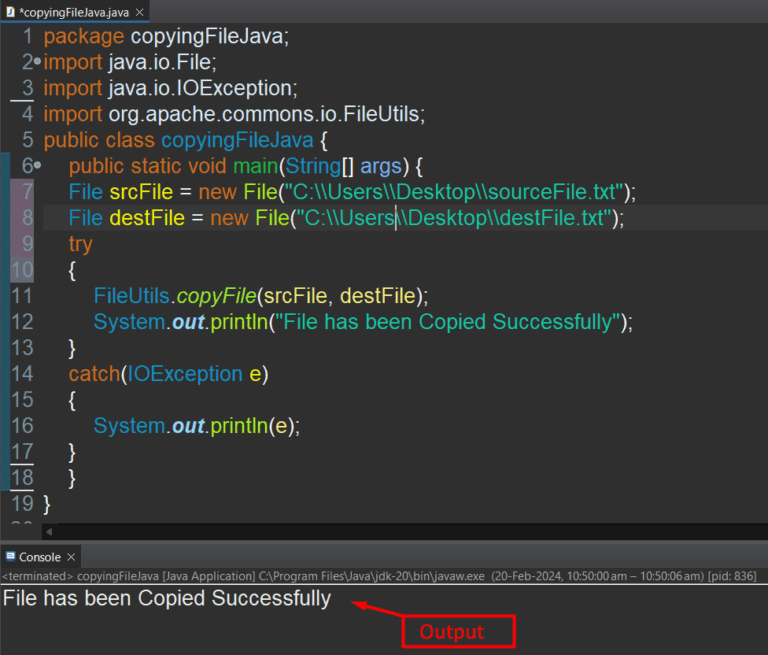
How to Copy a File in Java? | 5 Ways
The Java file copy operations can be performed by using public classes, built-in methods, third-party libraries, or different packages as shown in this guide.
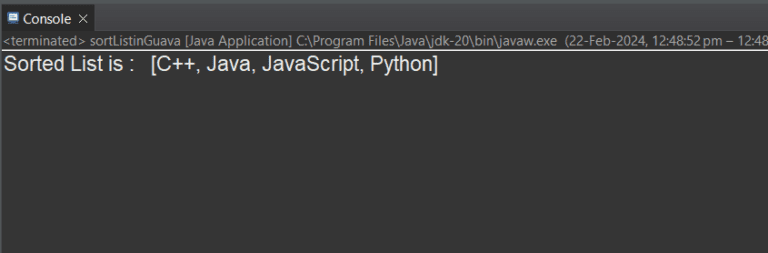
How to Sort() a List in Java?
To sort a List in Java, you can use Collections.sort(), Comparator.naturalOrder(), Stream.sorted(), List.sort(), Ordering class of the Guava Library, etc

How to Get the ASCII Value of a Character in Java?
To determine the ASCII value of a character in Java, you can use Format class, brute force method, type casting, etc as shown in this guide.

How to Throw Exceptions in Java?
To throw a Java exception, the “throw” statement creates a new Exception with a custom message. The exception thrown will be caught by the relevant catch block.